


Automatic1111 - txt2img
A crash course on settings related to text-to-image generation.

The Automatic1111 web app UI might be a little daunting if you don’t know the basics of what you are seeing. Here is a screenshot of nearly default settings having generated an image for us (quality is in the eye of the beholder).

Things to consider here before we jump in are:
Automatic1111 is a web app and API created to make working with Stable Diffusion models easier, versus working over the command line. Both options have their place, but for many users this is a great way to get started.
Resource contention. It’s safe to say, any increase in values here will increase the strain on your laptop, so be mindful. Start with less intense settings to get into the ballpark of what you are trying to achieve.
Steps. The number of steps the sampler will take to generate the final image.
Convergence. Does the sampler process eventually land on the same image (a non-convergence style sample will generate a different image each time).
Nearly everything you do in general is output to a specific folder named
outputs, inside thestable-diffusion-uifolder.
Based on the image provided earlier, we will cover the various sections. From top to bottom, left to right related to txt2img specifically.
URL Bar

Might seem obvious, but this is the default URI for accessing Automatic1111 once it is launched in case you need it (http://127.0.0.1:7860).
Stable Diffusion checkpoint

This dropdown provides access to the models you have downloaded. They reside in /stable-diffusion-webui/models/Stable-diffusion folder. Files you would find here end in .safetensor, .ckpt and .yaml depending on what version of the models you are using.
txt2img
This article focus on the txt2img tab primarily, broken down by section below.

Prompt(s)
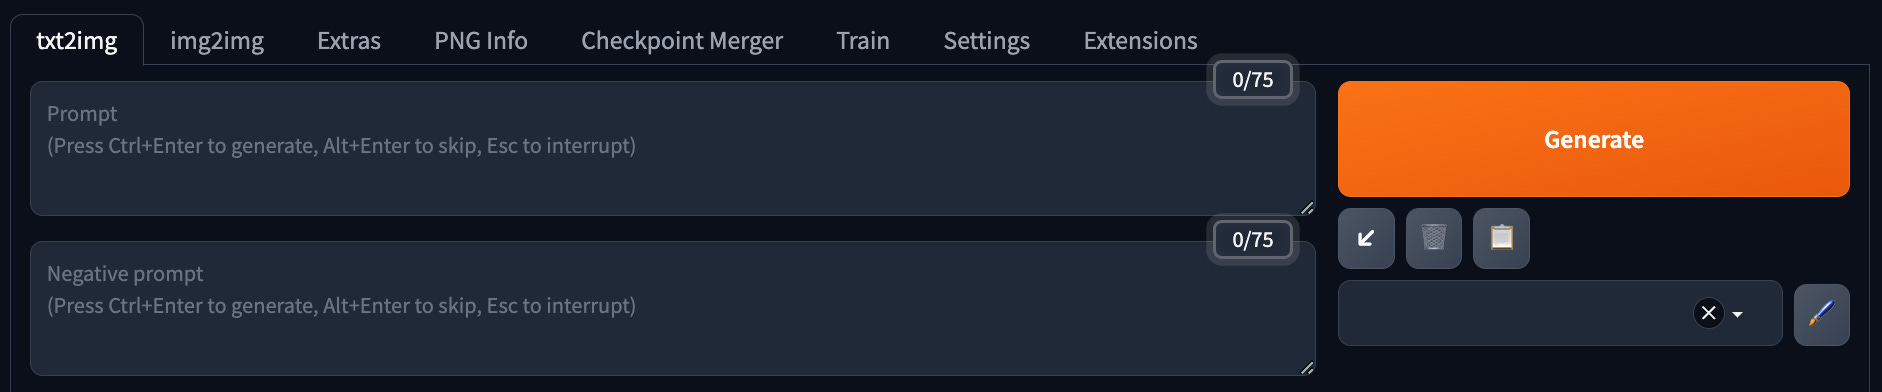
For nearly everyone new to this tool, the txt2img tab is where you will start your journey. The prompt section allows you to enter your vision and execute the actual generation of the image. You could short circuit the rest of the article here as the default settings will allow you to generate images from the start!
Prompt Concept Crash Course
Prompt - Your focused prompt, what it is you are looking for.
Negative prompt - What you would like less of, or things removed/not generated in your image.
Prompt limited to 75 tokens in a prompt batch (not same as image batch). If you exceed the limit, a second batch will be created where the weight of the first word in the second weight is the same as the first word in the first batch. More tokens can lead to noisier images.
Syntax. There is a specific syntax to be aware of in your prompt/negative prompt. We will cover that in a different article.
Generation
Where you configure how the images are created by the sampler against your chosen model and prompts.

Sampling method - Critical. Samplers define the algorithms behind the scene on how the image generation will go. There are several online resources describing the pluses and minuses of the various Sampling methods. Do take a look to see what style you prefer.
Schedule type - Part of sampling method configuration. In earlier versions, you might see a sampler named "DPM++ 2M Karras", but now you get a sampler option of "DPM++ 2M" with a schedule type option of "Karras" (and other types, including automatic).
Sampling Steps - How many steps a sampler will run to generate your image. Various samplers will have less noise to deal with the more steps you take. This leads to higher quality images.
Hires. fix - Enabling will change the process to enable larger, more detailed images during generation.
Refiner - Changes models at a specified step for a second a pass.
Width and Height - Output image height. Some models require specific dimensions (generally for minimum dimension).
Batch count - How many images to generate at once (memory intensive). Think of total images in a generation.
Batch size - How many images to generate at one time.
CFG Scale - Classifier Free Guidance Scale. This is the field that defines how creative the interpretation of your prompt will be. A lower number gives the process more creative leeway. The higher the number, the closer it tries to follow your specific prompts. Extreme values here can cause various artifacts to appear and ruin the image.
Seed - Sets the value used by the random number generator. If you have the same parameters with the same seed, the sampler will generate the same image. If you change only the seed, it will change the final output, regardless if all other parameters are the same.
Scripts - There are a few default scripts currently provided, as well as the ability to add your own, to do a variety of extra processing during the image generation pipeline.
Output

The output window has several features aside from previews of the generated output.
Folder - Open output location.
Disk - Save to dedicated directory (log/images).
File Cabinet - Zip to dedicated directory (log/images).
Palette - Copy image and parameters to img2img feature (tab next to txt2img).
Ruler - Send image and parameters to extra feature (tab next to img2img).
Sparks - Create an upscaled version of the image, using settings in "Hires.fix" regardless of it being enabled or not.
Footer

Easily overlooked but gives you some good info:
Link to the API docs. You can use the Automatic1111 services via your local scripts!
Versions of key libraries Automatic1111 is using.
Reload the UI. Sometimes you make setting changes and need to refresh the screen, an easy way to do it. It closes and restarts the server.


Summary
There is a lot more to learn in terms of options, how Automatic1111 works in relation to Stable Diffusion models (some features don’t apply to all models), and how to get the best output. The basic flow for txt2img after opening the page:
Select your model.
Select your sampling method, schedule type and sampling steps.
Configure your image output.
Select number of images to generate.
Set the Guidance Scale (CFG Scale).
Enter your prompts.
Click generate.