


What is a VS Code Extension?
Visual Studio Code at its heart, is a source-code editor that can do most of the things one expects when working in a given programming language. However, its abilities are not limited to just editing code. It also allows you to extend the IDE in a great many ways, to help assist you in whatever tasks you might have. Many extensions in the Visual Studio Marketplace of course are focused on enhancing your code editing experience. Other extensions are complete tools by themselves, like Postman.
Yeoman and Additional Basic Tooling
While one could build an extension by hand, even Microsoft has a tutorial that utilizes Yeoman, a tool that builds the scaffolding of many different projects. In our case, we will use it to scaffold the basic framework of our extension for us.
Prerequisites
Assumptions here you have installed:
Visual Studio Code
Homebrew.
Tooling Installation
You may already have node installed, but just in case we will install here, via Homebrew.
Install Node (node)
brew install nodeWe need node for a variety of reasons, but initially to get NPM (the node package manager) to install Yeoman.
Install Yeoman (yo)
As Yeoman is a node package, we will use NPM to install yo and the VS Code Extension Generator:
npm install -g yo generator-codeBuilding Your First VS Code Extension
Now that the underlying frameworks are in place, time to use Yeoman to build our first extension. There will need to be some decisions made as we go along.
First, navigate to the location you want your extension to be placed. Or tooling will create the top level folder for you, so if you have a folder that you place your code in, be sure to run the command inside that folder.
Now run yeoman pointing to the VS Code Extension generator:
yo codeIn your terminal you will be presented with an interface asking to fill in the blanks. It will look something like this:
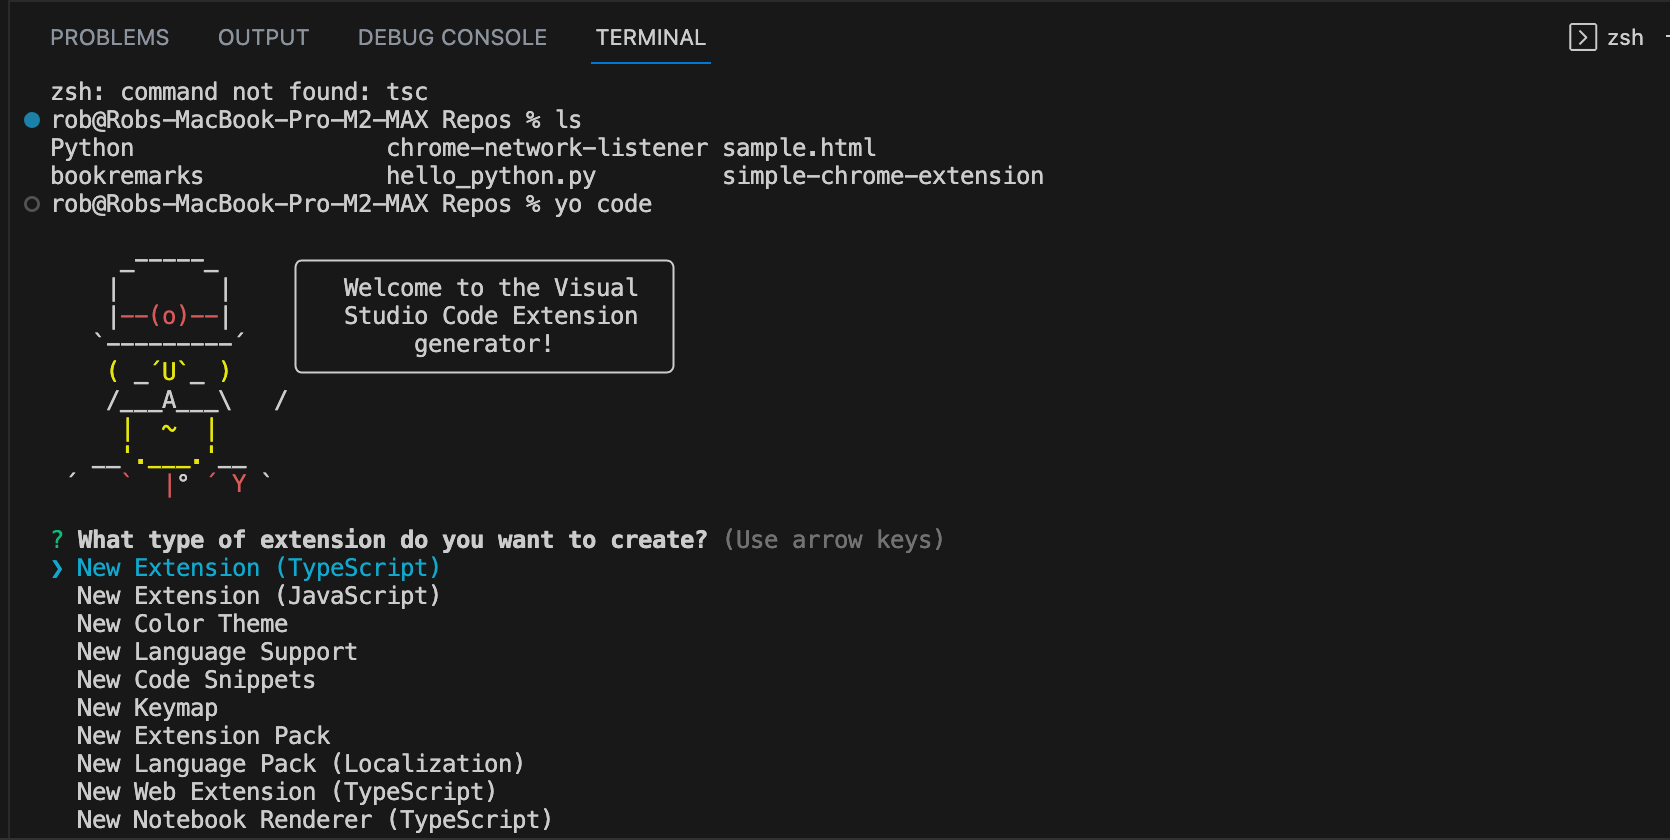
For simplicity we are going to make the following choices:
Select "New Extension (JavaScript)". Press enter.
TypeScript is fine, however at this moment we did not talk about installing the typescript compiler. Also TS compiles down to JS.
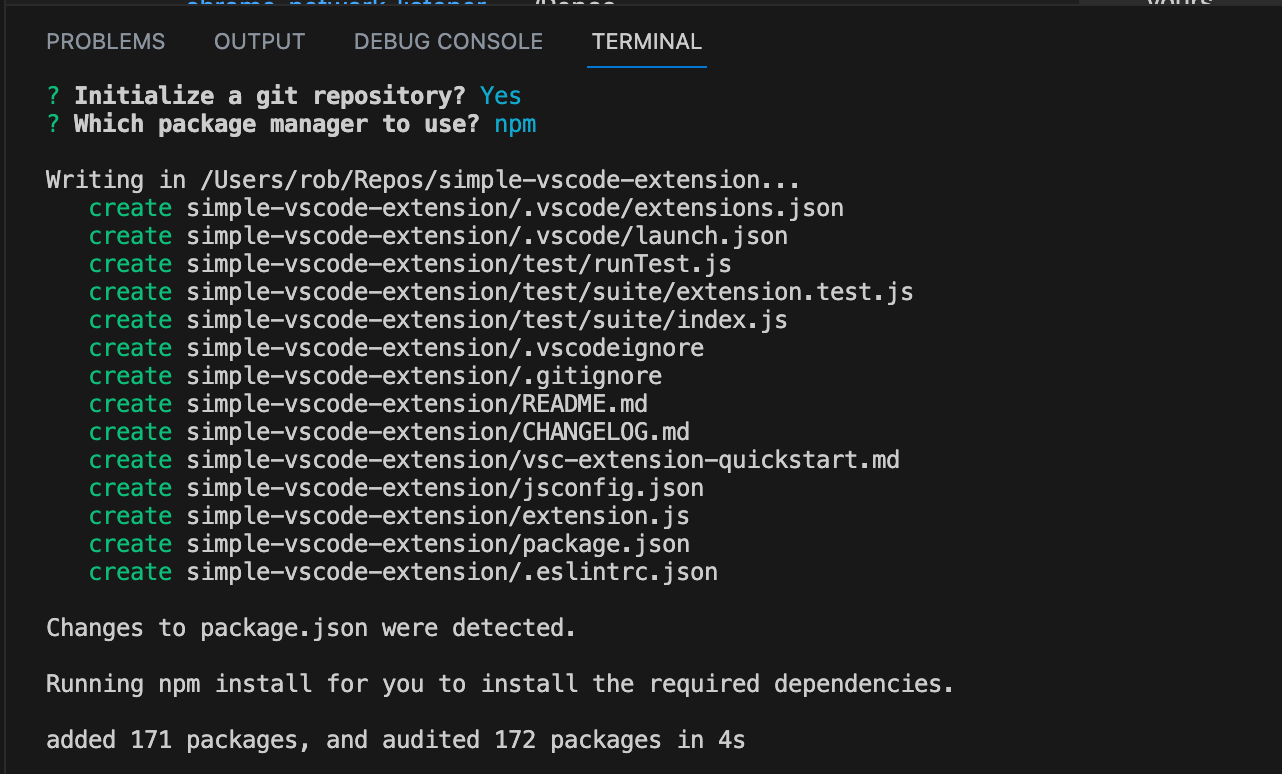
It will now prompt you for a name. I am using simple-vscode-extension for now. Press enter.
What is your extension identifier? Leaving blank, press enter (will default to your name in question previous to this).
What is the description, leave blank, press enter.
Enable JavaScript type checking in 'jsconfig.json'? Type y, press enter.
This is nice to have. While we chose not to use typescript for now, we can get additional tooling help from VS Code by selecting yes. Read more here.
Initialize a git repository? Type y, press enter.
Which package manager to use? We will stay with npm, so ensure it’s selected and press enter.
At this point Yeoman will work its magic and create several folders and files for you which you can see in the output:
However we are not quite finished:
Open with 'code' or Skip? Select Open and press enter.
You will now get a new instance of the VS Code IDE opened to your new extension project. You might be prompted (depending on your setup) to install various things based on file extensions of the newly created files in your extension.
In my case, it was recommended to install 'ESLint' from Microsoft, to which I will choose to install now (but is optional for you). (I intend to work out of VS Code primarily, alternatively you could say no, and then run:
npm install eslint --globalTo make it available everywhere. ESLint statically analyzes your JavaScript code to help find any errors.
What Was Created?
As you might now expect, a basic VS Code extension, named simple-vscode-extension has been created. Inside the folder is a variety of folders and files so let’s quickly go through them:
.vscode (folder)
extensions.json - tells VS Code what extensions to recommend for installation when working on this project.
launch.json - configuration for the VS Code debugger.
node_modules (folder) - npm-installed packages (Do not check into GitHub!).
test (folder)
suite (folder)
extension.test.js - where your tests reside.
index.js - configures the test suite (uses Mocha).
runTest.js - Does setup to run tests.
.eslintrc.json - for configuring ESLint.
.gitignore - to prevent folders and files from being checked into Git/GitHub.
CHANGELOG.md - for recording any notable changes to your project.
extension.js - primary extension code goes here.
jsconfig.json - JavaScript configuration.
package-lock.json - npm-generated file to keep track of specifically installed dependencies (and sub dependencies).
package.json - node project config and metadata. npm also uses this file to know what dependencies to install.
README.md - file used to provide project details in GitHub.
vsc-extension-quickstart.md - a guide provided describing key files that were generated, how to run your extension, etc. Some details here might not apply (as the files that have been generated have changed over time.
That might seem like a lot but it all boils down to files that:
Run the code your extension is designed to do.
Hook into VS Code, meaning the IDE.
Hook into other tooling, like npm, node, GitHub, etc.
Describe what we got going on.
Running the Extension
From here, as we only have a source code view of the extension, we need to launch a new VS Code instance with your extension loaded. Simply press F5. What happened?
A new instance of VS Code is launched, with your extension enabled. You can confirm this in the title bar of the IDE:

VS Code title bar showing your extension is hosted in this instance. The original instance of VS Code is now in debug mode:


From here you can execute the default features of the extension given by the generator for us.
Default Features
Our auto generated code has given us one command to run, via the VS Code command palette (⇧⌘P), "Hello World". This command (as in the words to type) is configured in the package.json of your extension under "contributes.commands["title"]". A sibling key here is "command". This key’s value is how you find what the command does. So in our case with the value "simple-vscode-extension.helloWorld" we will be registered in extension.js in the activate method.
The anonymous function tied to this command, is as follows:
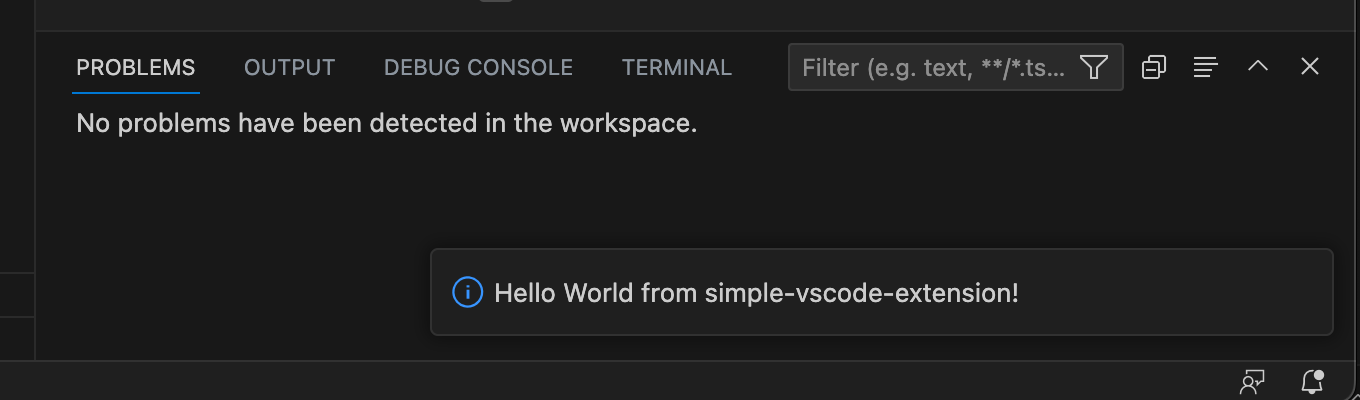
// Display a message box to the user vscode.window.showInformationMessage('Hello World from simple-vscode-extension!');After running "Hello World" in the command palette such as:

You will see an informational dialog open in the bottom right with "Hello World from simple-vscode-extension!" being displayed such as:
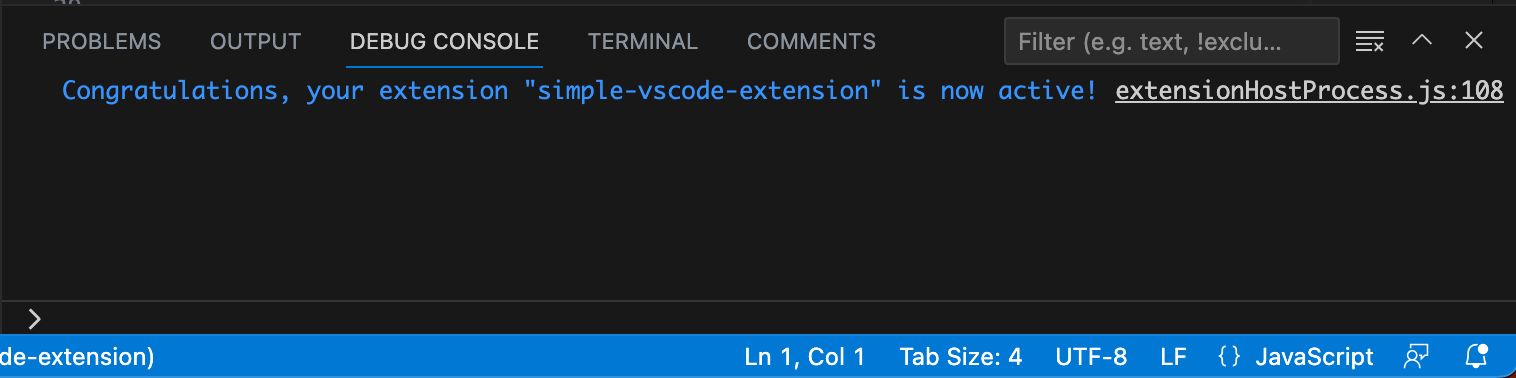
Back in your original VS Code instance, in the DEBUG CONSOLE tab, you will also see output from the active(content) function:
Whats Next?
There you have it, the standard out of the box VS Code extension and details about what is going on. As a typical "Hello World" type of application, this is merely the beginning. In a future post we will discuss enhancing the extension to do more realistic tasks, expose additional functionality, testing your extension, how to debug it, etc.
The code for this post can be found on GitHub here.