
Guide: ComfyUI and Wan 2.2 Image to Video Generation
Getting started with video generation on Apple silicon.

The goal of today’s post is to create a video, generated by AI on your local Mac.
Prerequisites
It is presumed you are using a Mac with Apple silicon. Ideally something with a decent amount of RAM and CPU/GPU cores. For example I am using a M2 MAX with 64 GB RAM. You can use less, but performance will be degraded and configuration tweaks will be required.
Additionally:
Ensure you have plenty of free space for the models (maybe as high as 50 GB to start minimum) as you need multiple with a few being quite large.
Ensure Python is installed (as ComfyUI runs on Python).
Installation
First step, install the ComfyUI application. You can also install this via Git but we will use the homebrew application instead. We will handle additional details later.
ComfyUI
brew install comfyuiAlternatively you can download the installation package here. The follow the typical Mac application install noted here.
Now to launch ComfyUI, simply go to applications or use the Spotlight Search (command-space and type ComfyUI). This will launch the application and get you to the welcome screen:

The documentation noted earlier can help guide you but the primary configuration options to know are:
MPS → Metal Performance Shaders. This is the framework used by Apple, on your Apple silicon-based hardware.
Default locations are fine.
Be sure you have enough space for models, so pay attention to the location where they are stored (they can be 10’s of GB if not more).
Ignore the migration.
Turn on Automatic Updates (AI changing fast!)
From here it should be good to go barring any issues like Python configuration problems, etc.
Generating Your First Video
Feel free to try the initial image generation workflow just to get some exposure. When ready, let’s get to the video!
ComfyUI makes many aspects of doing any AI work locally much easier, however it is a complex process overall and in a lot of flux. Steps to get started:
Click Templates (right menu).
Click Video.
Click Wan 2.2 14 Image to Video. This will load the current version of video_wan2_2_14B_i2v.json (i.e. the Wan 2.2 Image to Video workflow).
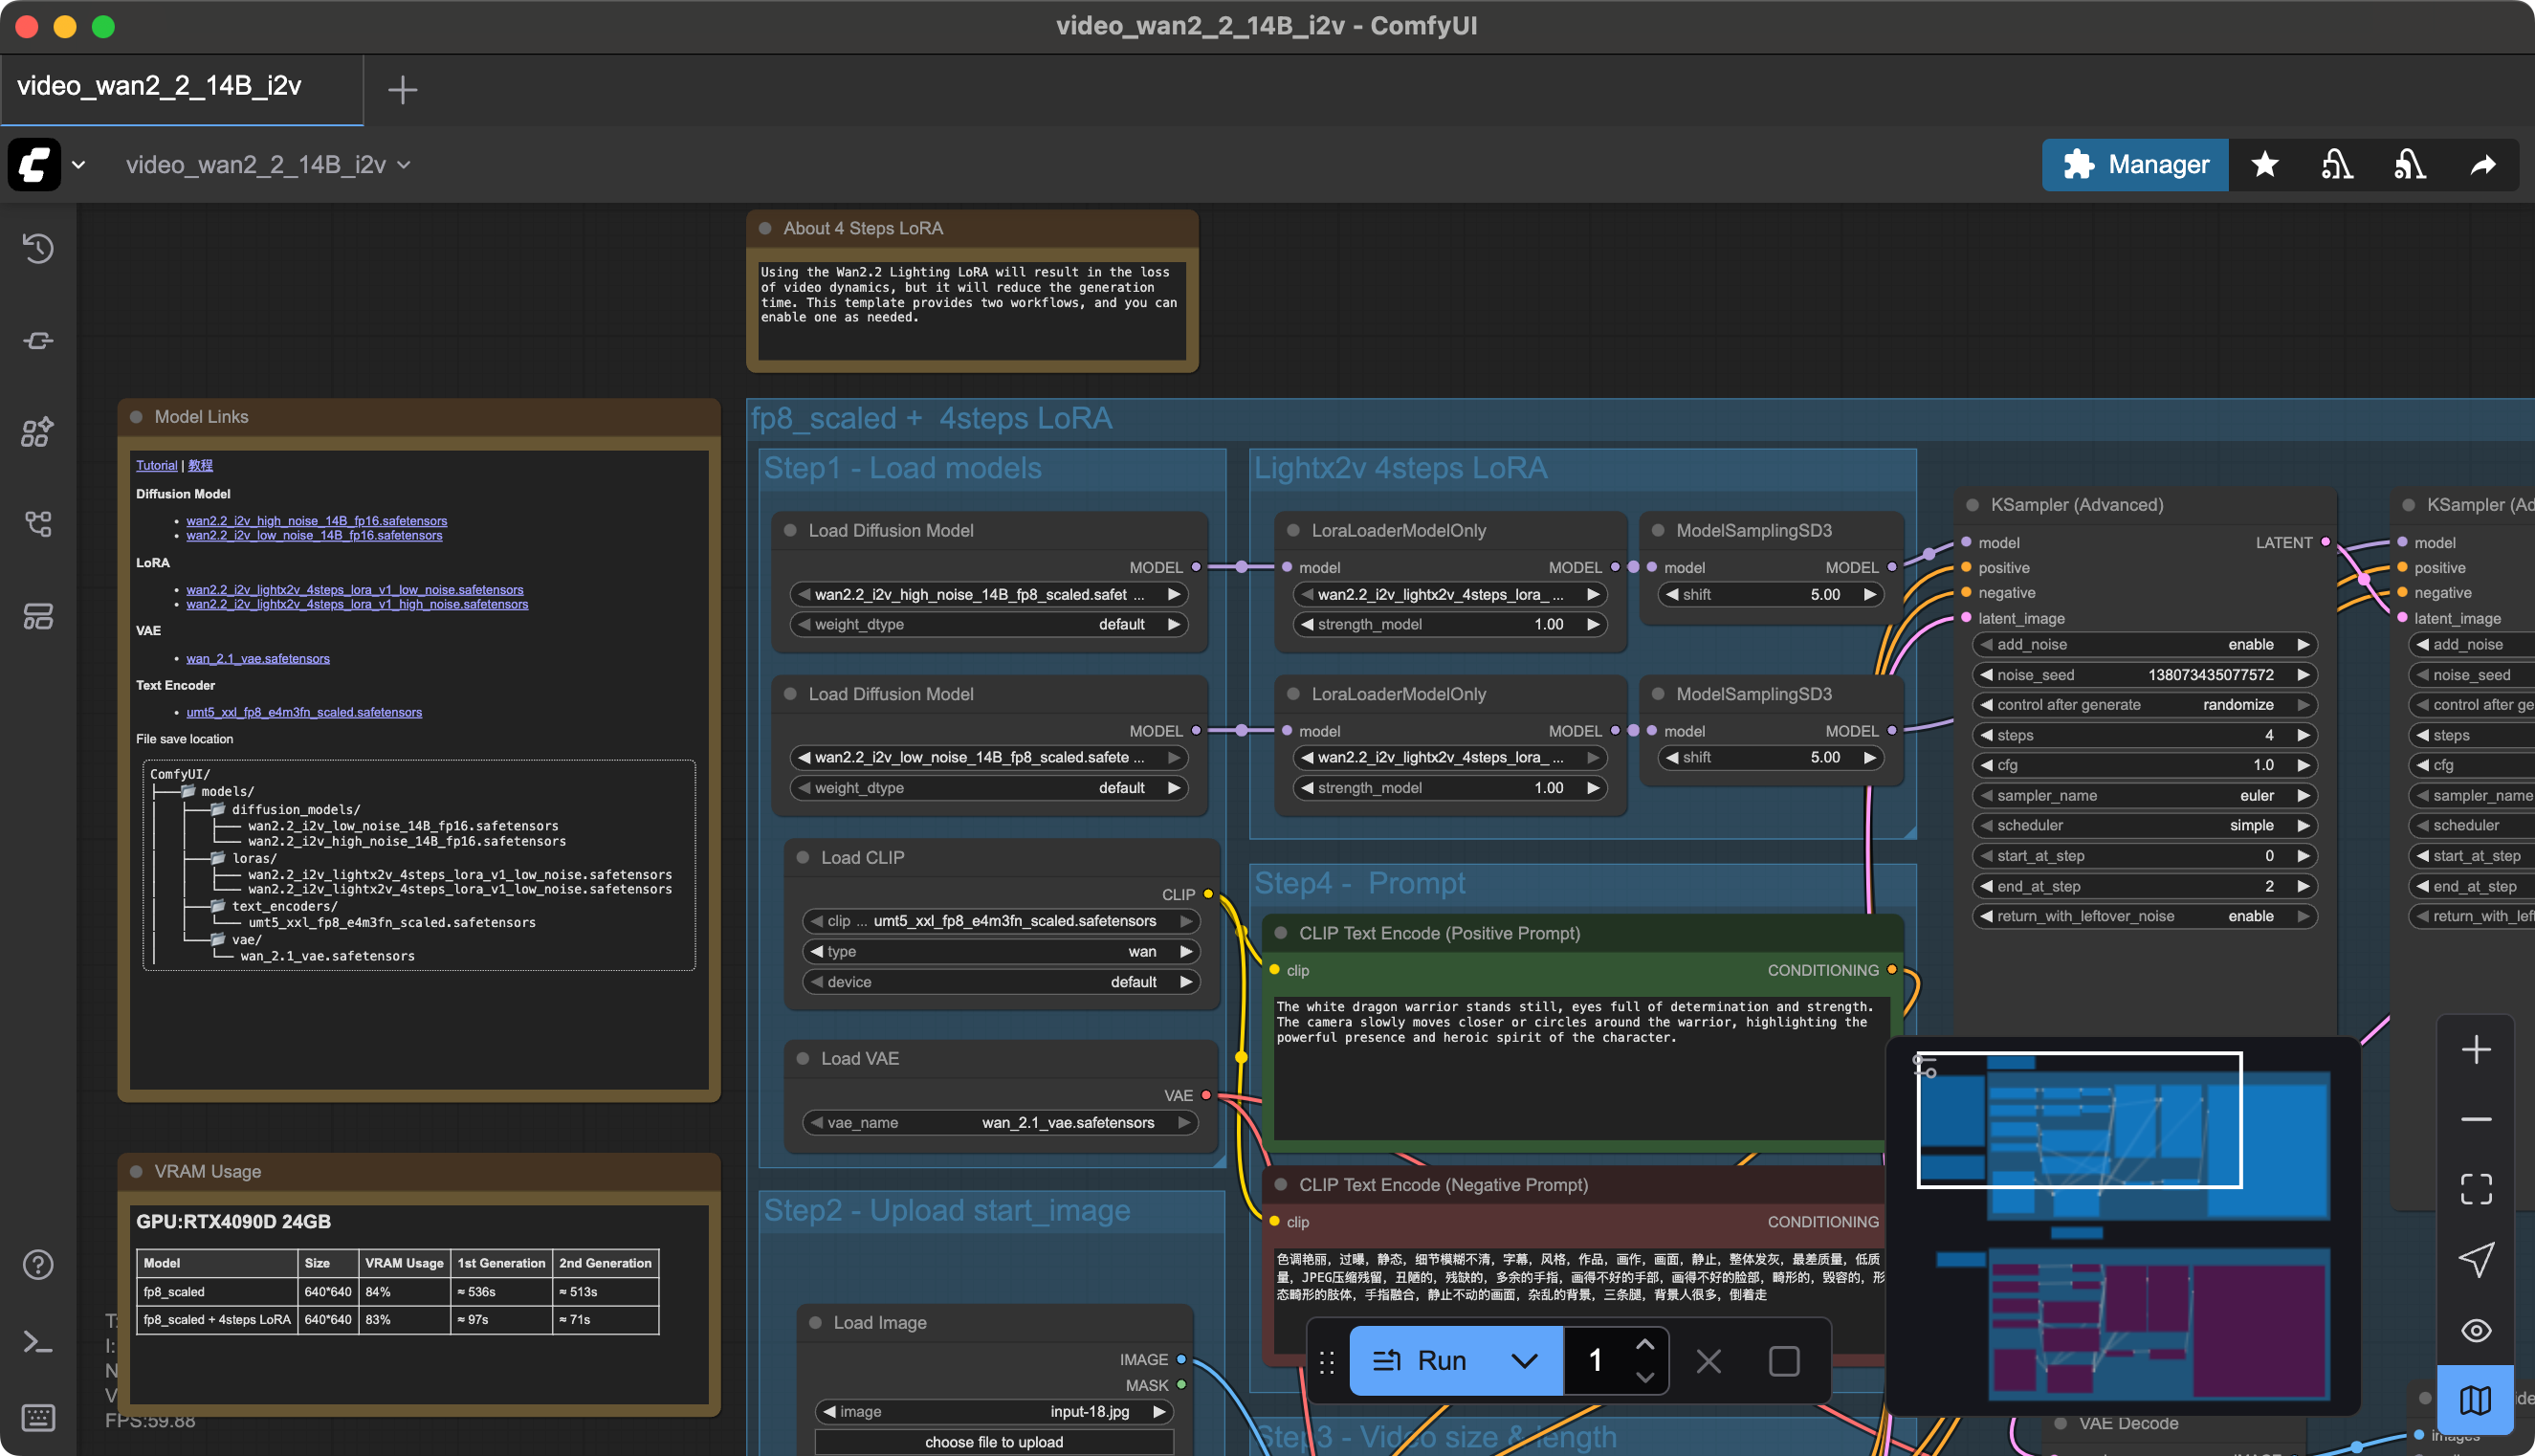
So what is all this?
ComfyUI uses a visual programming interface, where nodes represent steps in the workflow. Think of it as a flowchart for AI tasks—each node loads models, processes data, or generates output. Each node serves some purpose in the workflow. In our case, reading through simply you can think of this as loading models and the image we will use, processing details about the models in relation to the positive and negative prompting (Note: The negative prompt is in Chinese, as the Wan model (developed by Alibaba) supports both English and Chinese prompts), processes the data, and parses it into images for video output. Obviously not that simple behind the scenes but that is the general flow.
Now in my case (I say this because your version of ComfyUI might work differently) the default workflow did not work. So part of the point of this article is to discuss why and how to address these specific things. I will note some errors that can happen before getting more into the details on how to configure things in case you already clicked Run!
Issues and Errors
Missing Models
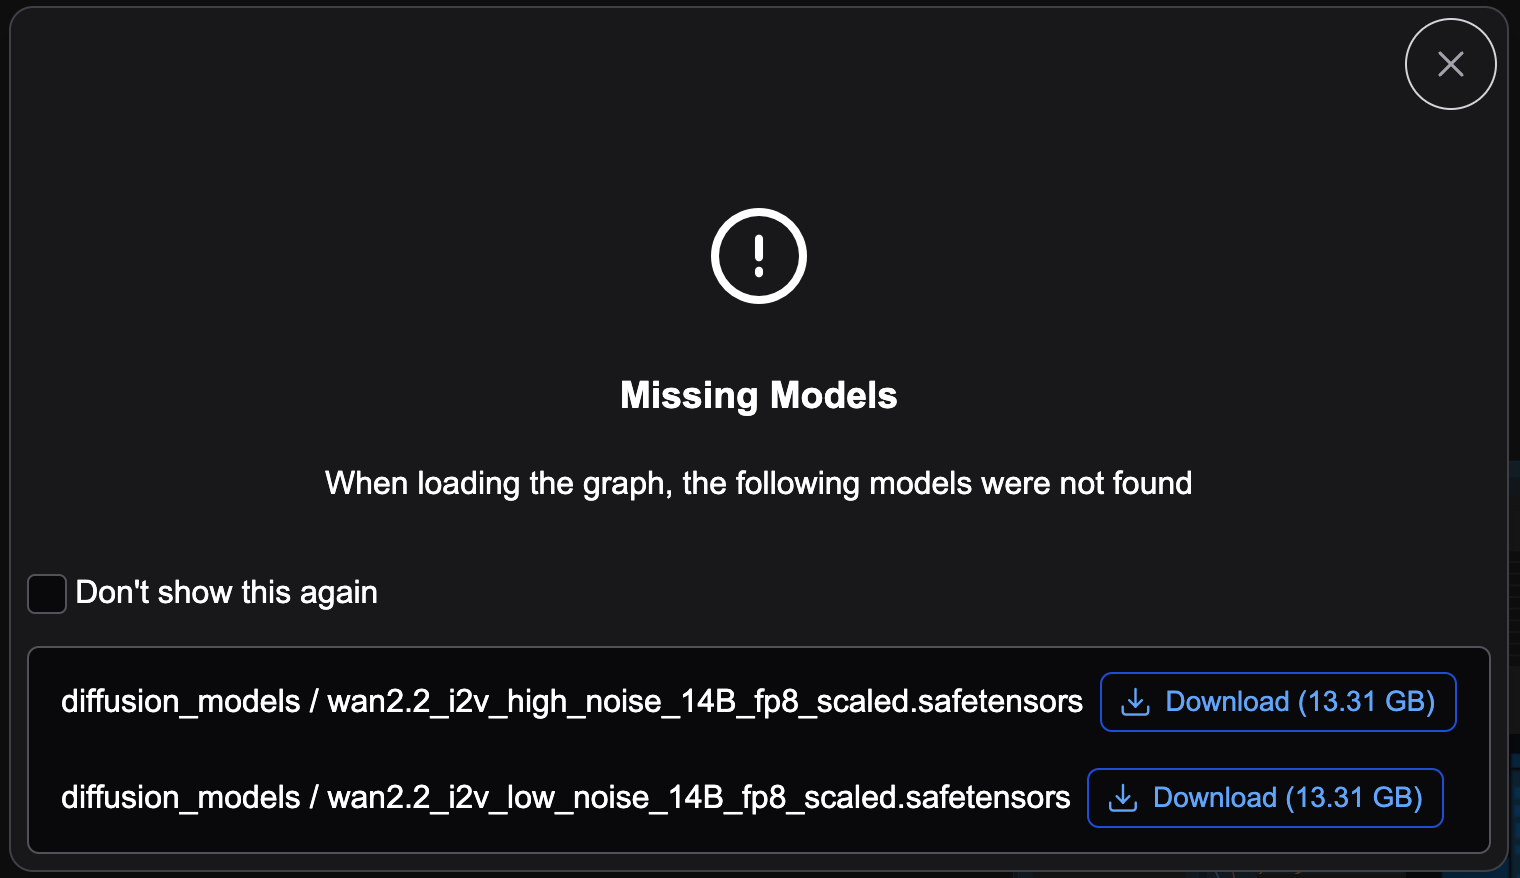
Oops! You mean they didn’t support 30+ GB of models in the download?! Thanks to ComfyUI a super easy fix, just click the Download buttons for each model missing. In this case it’s missing two (as I already had all of them just wanted to show how to address this). However, we will have to find some other models manually to fix the workflow.
Out of Memory (OOM, PYTORCH_MPS_HIGH_WATERMARK_RATIO error)
I wrote a quick note on this issue and how to address it. If you receive an error mentioning the PYTORCH_MPS_HIGH_WATERMARK_RATIO, check it out.
LoadImage Error
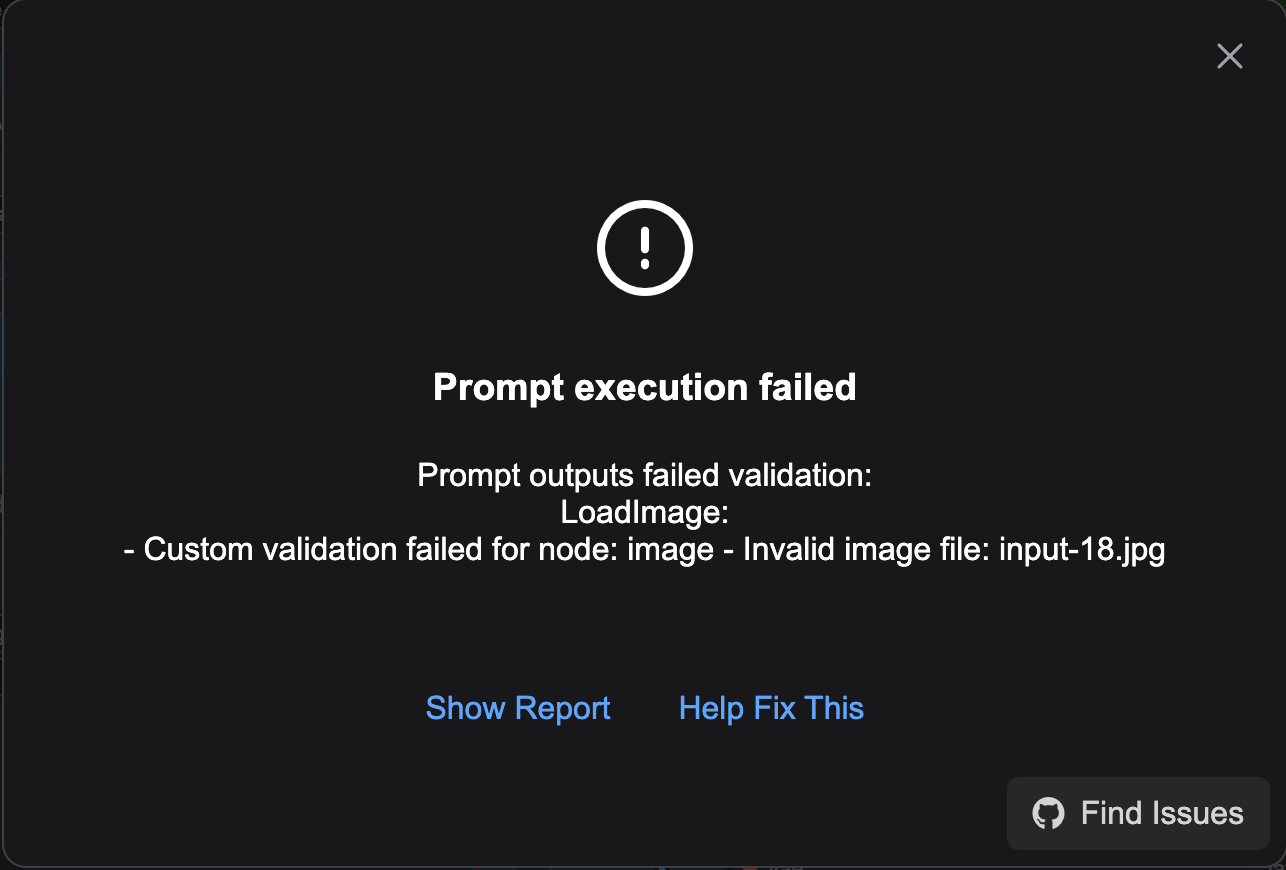
This is an easy one to fix. The workflow does not provide the image it uses. Given the prompts here mention a dragon, you need to find that (or a similar) image or your results might be crazy. You can find the image they use here (as well as the default tutorial details for i2v with Wan 2.2). By updating the node to find the image you downloaded (click “choose file to upload“ in the Load Image node, you have just made your first config change to a node.
KSamplerAdvanced Error
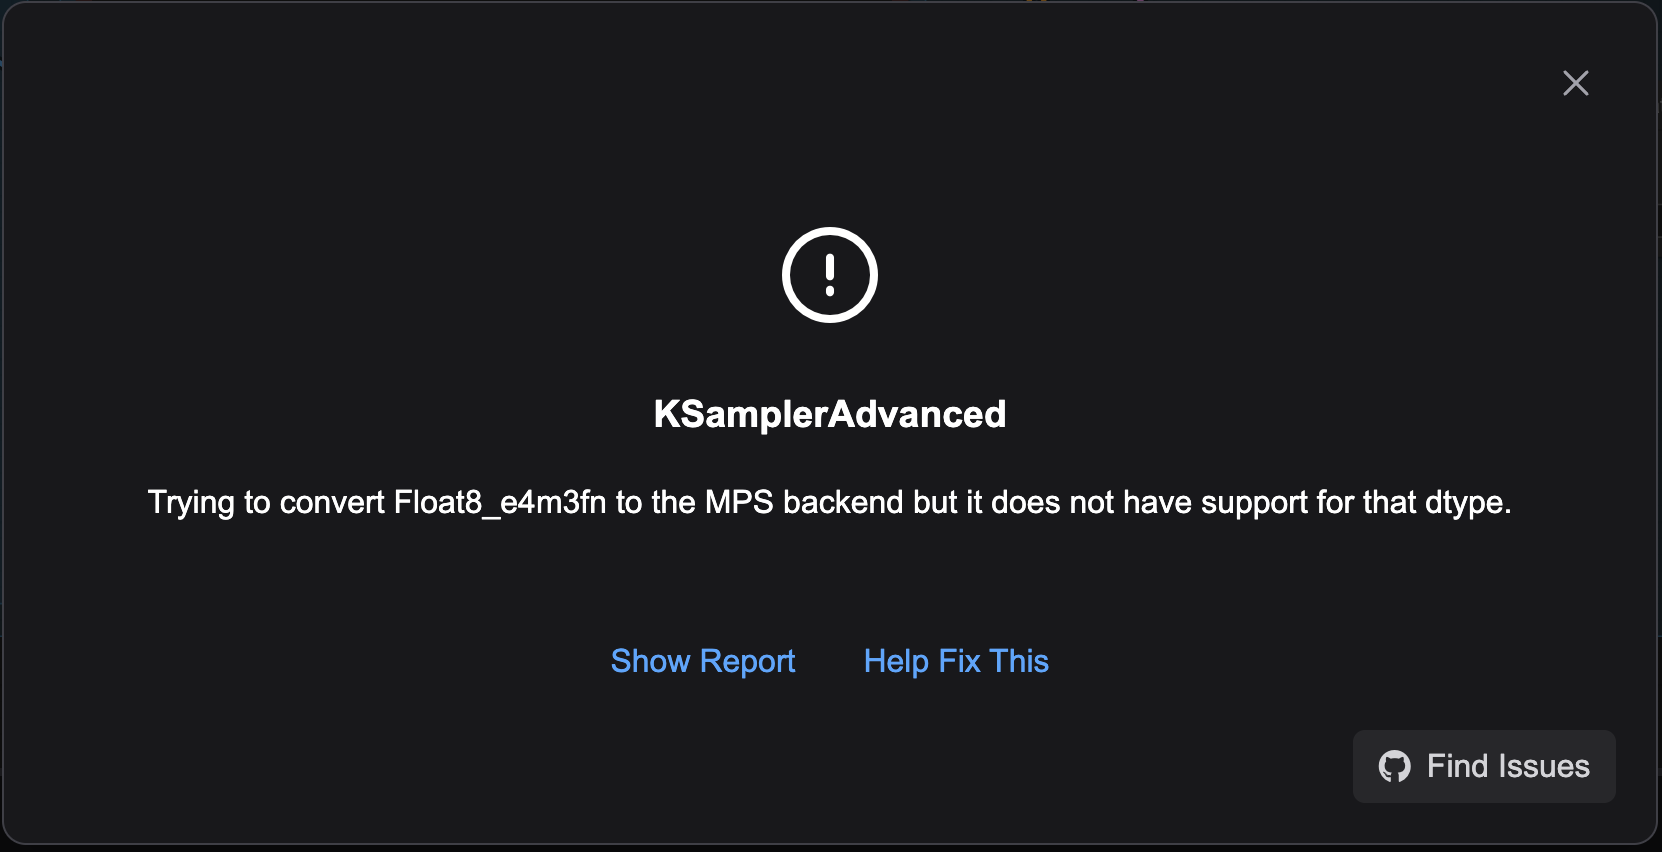
What happened now? Remember the models we downloaded earlier, the default Diffusion Models won’t quite work on the Mac silicon. Unfortunately, the default workflow isn’t optimized for Mac silicon, so we’ll need to make a few adjustments.
This is related to specifically the lack of support used by these models and there are a few ways to address it. For now, we will use a different set of models and update the workflow.
Installing the Unet Loader (GGUF) Node
The models we will be using are GGUF models (a different format internally) then the diffusion models the workflow asked for in the start. However we can’t use the same model loader nodes (Load Diffusion Model). As these are custom nodes, we need to do the following:
Open a terminal and navigate to
/Users/<username>/Documents/ComfyUI/custom_nodes.Run:
git clone https://github.com/city96/ComfyUI-GGUFThis will download the current version of this node for us.
Click Manager→Restart to restart ComfyUI.
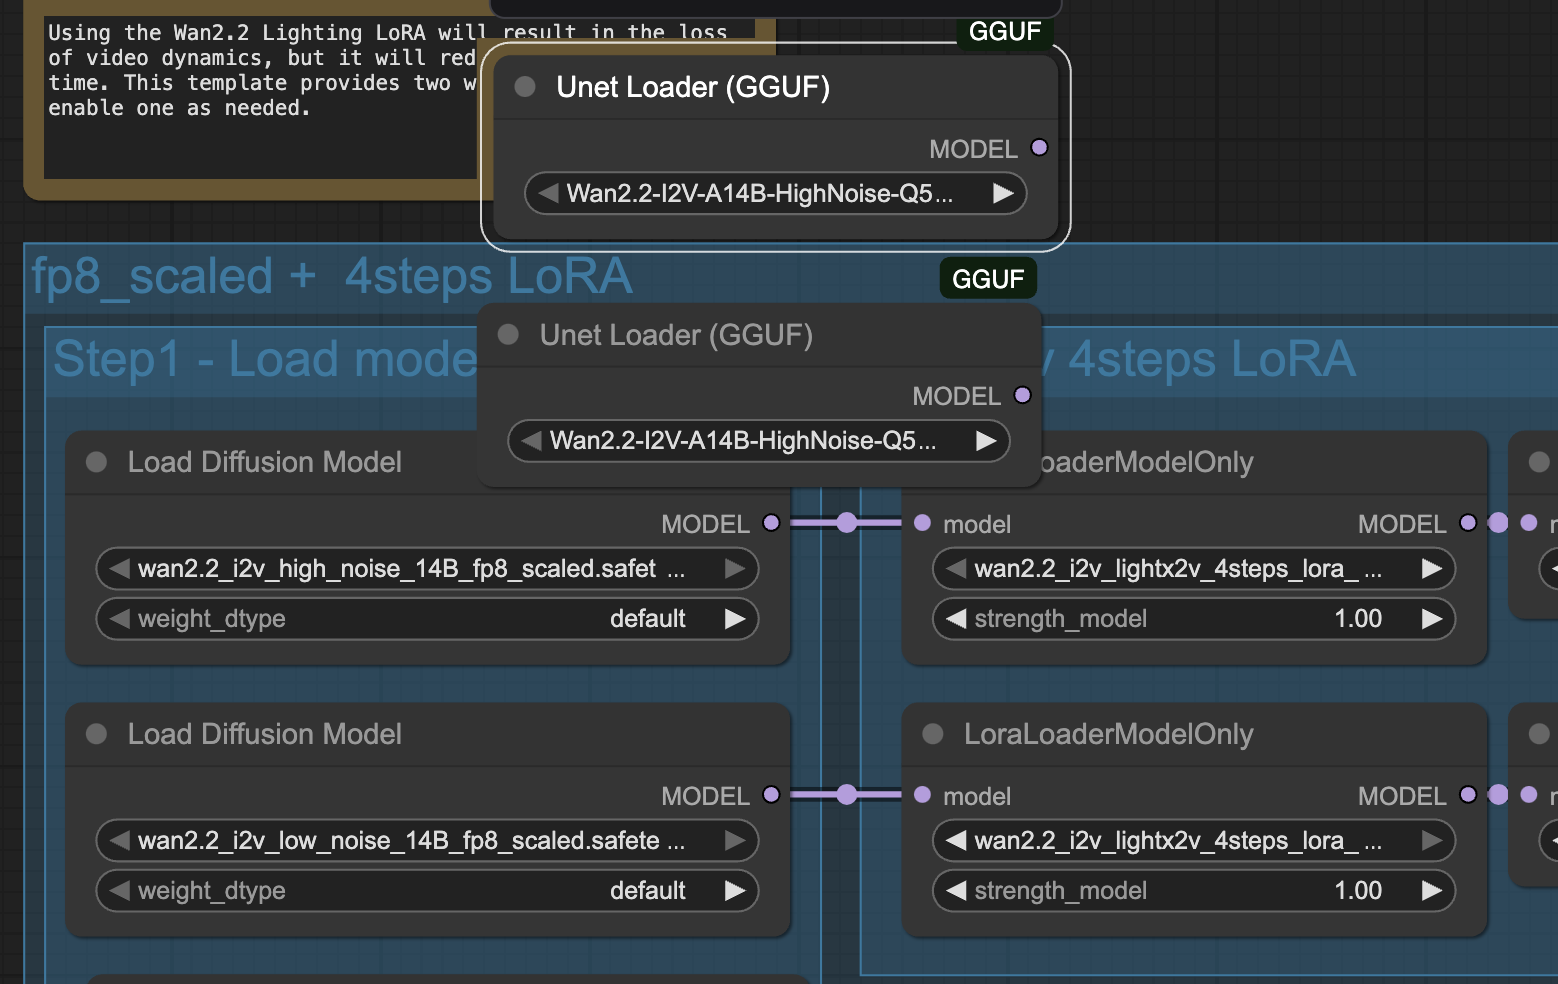
Click Node Library and type “gguf” in the search box. Select bootleg→Unet Loader (GGUF). This will add it to the workflow.
Now that you’ve added the first Unet Loader (GGUF), add a second one to replace both diffusion model nodes.
Visual Programming
This is now where you will do some visual programming. We will set up the two new Unet Loaders (GGUF) to replace the two Load Diffusion Model loader nodes.
Click the top Load Diffusion Model node and delete it.
Do the same to the second.
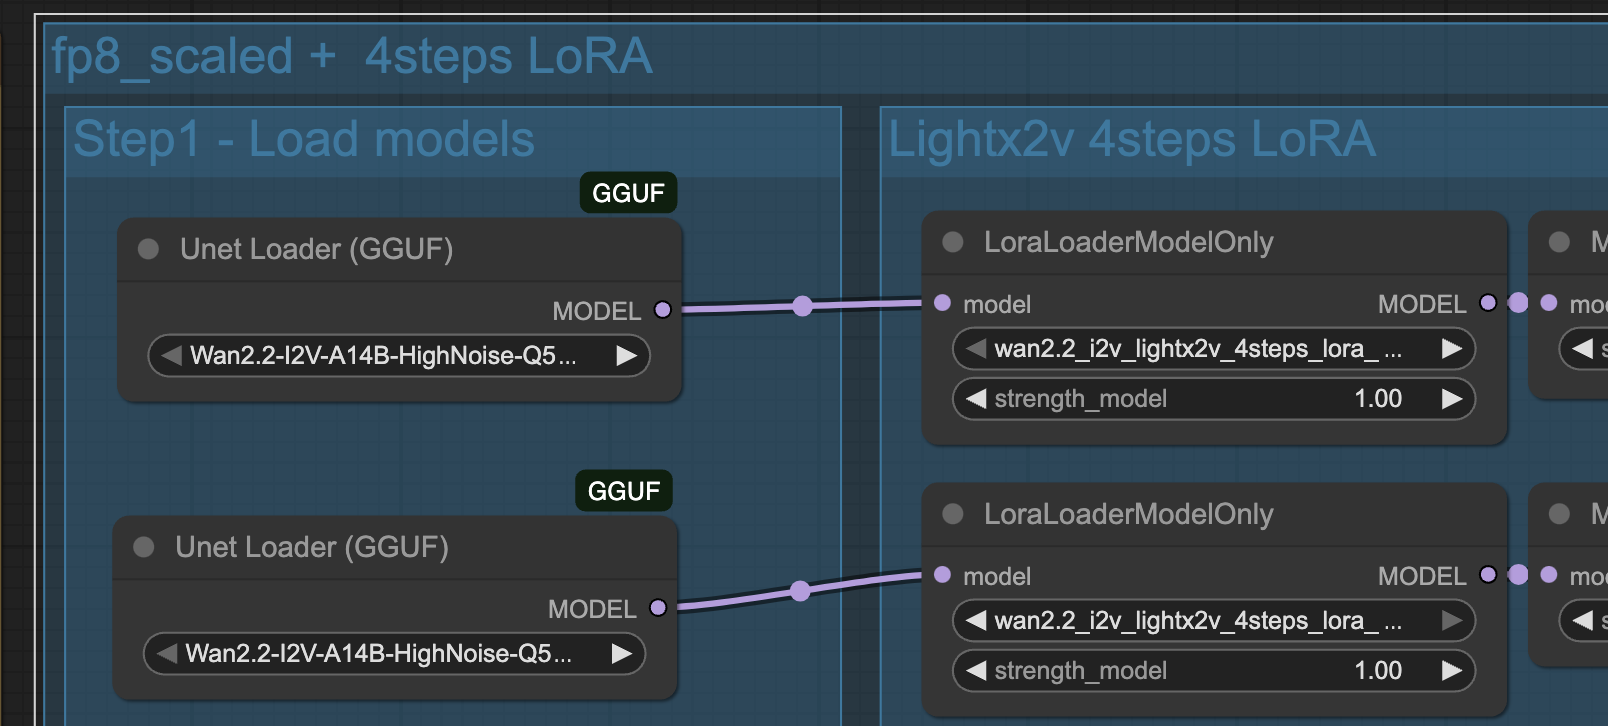
Drag the two Unet Loaders (GGUF) into position. (Mine already show the new models you will download shortly).
Click the model dot on the top loader and drag to the LoraLoaderModelOnly node to the right of it. Do the same with the second set of nodes.
New Models
A variety of models may work, but for now we will use the following to replace the originals:
Information on these models can be found here. Just click the download button on each above if you don’t care about the details right now.
Save these files to the models/unet folder specifically at:
/Users/<username>/Documents/ComfyUI/models/unet
Now again, go to Manager→Restart to refresh ComfyUI.
Once restarted, update the models you downloaded will be eligible for selection in the Unet Loader (GGUF) node.
Specifically:
In the top node, choose the HighNoise variant.
In the bottom node, choose the LowNoise variant.
This is because of how Wan works. High noise helps figure out the basics of an image. The low noise, as there is less noise by that part of the pipeline, can focus more on the details of the image.
First Video
At this point you should be good to go! Click Run and well, step away for a bit and let your laptop get really hot. The default settings should generate a MP4 file located at:
/Users/<username>/Documents/ComfyUI/output/video
As well as show a preview in the ComfyUI screen when complete.
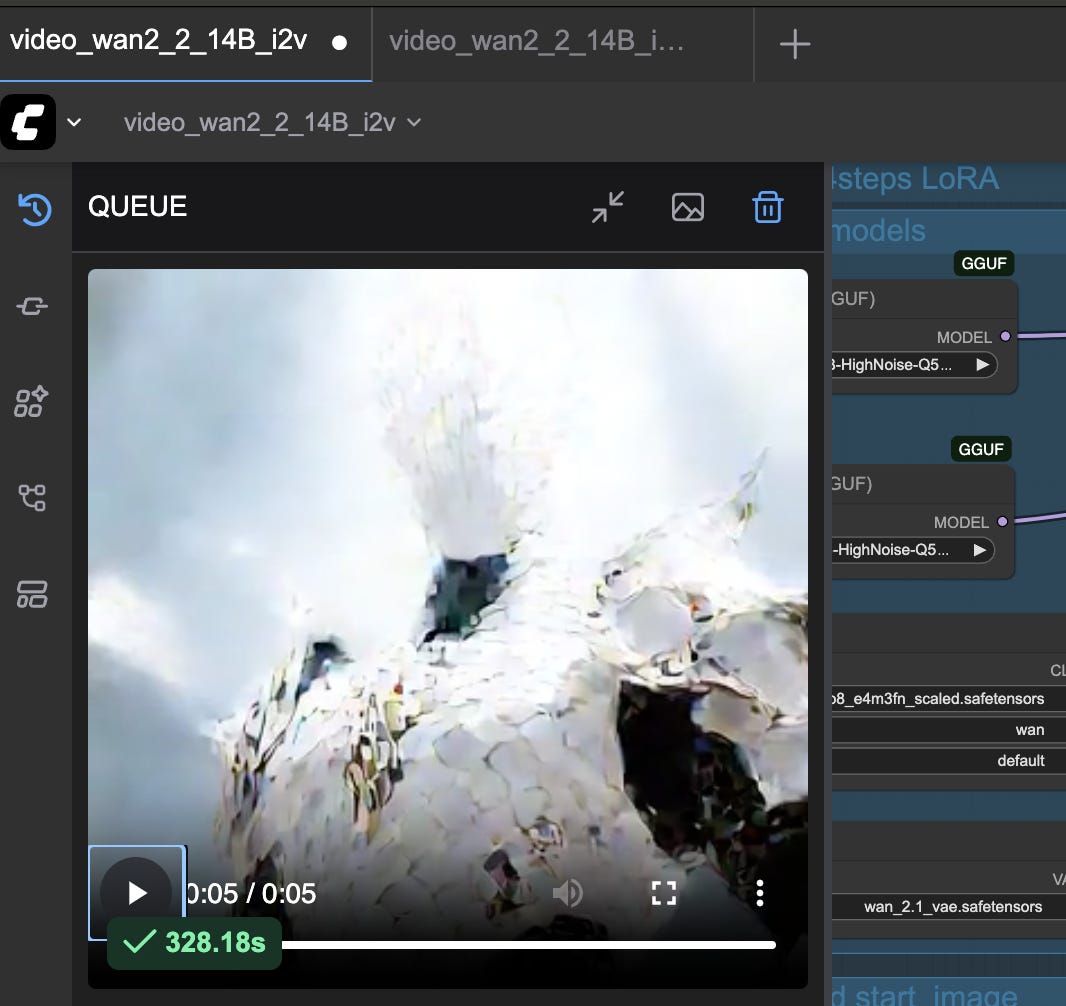
Below is the actual mp4 video that was generated.
In my case, the first attempt resulted in a black video. To fix this, I reduced the resolution from 640x640 to 320x320 in the WanImageToVideo node.
Quality can be tricky due to several factors, including memory pressure and node settings. Another could be the nodes themselves (for example there is an alternative VAE Decode that uses tiling called VAE DECODE (Tiled), under _for_testing folder in the Node Library. Using it (with reduced settings from default) might address the issue of the pixelation/tessellation for you.
There are other workflows and models out there as well which might better suit your needs and lead to better image output, better prompt coherences, increased resolution and length, etc.
Next Steps
Hopefully you too have generated your first video. From here, you can research other video workflows, model options, settings relative to your resources, etc in attempts to further refine the output. Additionally there are many other generative AI families out there (text-to-video (t2v), speech-to-video (s2v), etc) to explore as well.
Hi, I followed all your guide on my Mac Studio M4 Max, but it's stucked on Ksampler (Advanced) at 53%, is not moving forward, what can I do?