
Guide: Expo Go and React Native
Using Expo Go and React Native to build a universal app for Android on a Mac.

The following guide here will cover, from scratch, how to set up your local Mac environment to build, debug, and run a React Mobile app on Android using Expo Go and related tools.
What is Expo Go?
Expo Go is a sandbox for working with the Expo development environments. Think of it as a tool that will allow you to stand up your React Native app using Expo tooling, and then via Expo Go, deploy the mobile app to your device (Android or iOS).
Expo Go is not intended for production app deployment. Your app codebase however is the same. This means, after you iterate on your app, you can take the codebase and then move into the full Expo environment to eventually get your app in the Play or App stores. This is done by converting your Expo Go project to an EAS (Expo Application Services) Build style project pipeline, which allows cloud or local builds of your application, shared testing links, app store submission, etc. Expo Go is free, but Expo EAS does cost money after a free tier. You can iterate on the bulk of your project development before launching such a build.
Prerequisites
It’s best to start by reading the quick start primer for the various things we will be doing here. The immediate one to focus on is React Native to get a sense how it all ties together:
React Native Development Environment Setup Quick Start
For this tutorial:
You need to be on a Mac.
Have Node installed (one method to do so here is Homebrew).
Your Android device will be on the same wifi network as your Mac.
Initial Steps
Expo Go Installation (on Mac)
Via npx, we will use the create-expo-app generator to create a mobile app called ExpoSample. From the command line in your preferred folder:
npx create-expo-app ExpoSampleYou may be prompted to install an updated generator, if so, proceed:
rob@Robs-MacBook-Pro-M2-MAX react-native-test % npx create-expo-app ExpoSample
Need to install the following packages:
create-expo-app@2.3.5
Ok to proceed? (y) y
From here, change into the directory and open Visual Studio Code.
rob@Robs-MacBook-Pro-M2-MAX react-native-test %  cd ExpoSample
rob@Robs-MacBook-Pro-M2-MAX ExpoSample % code .
To smoke test Expo Go is installed and ready to go run:
rob@Robs-MacBook-Pro-M2-MAX ExpoSample % npx expo startThe output will look something like this:

Expo Go Installation (on Android)
There are several ways to run React Native/Expo applications. In this case we want to quickly get the sample application to a real Android device. To do this, first we must install Expo Go on the Android device.
Navigate to the Expo homepage.
Click Install Expo Go for Android, currently the Expo Go SDK is version 51:
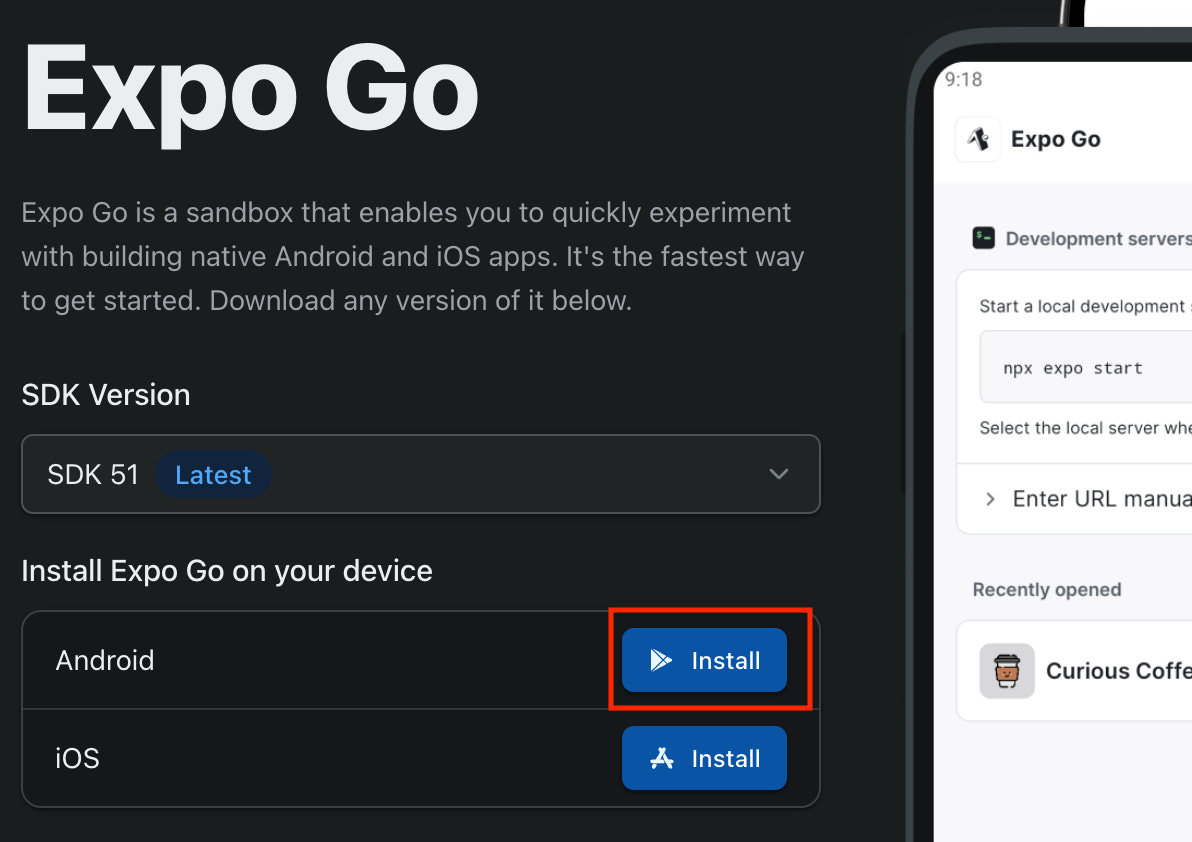
Via manual installation, scan the QR code from the dialog that opens:
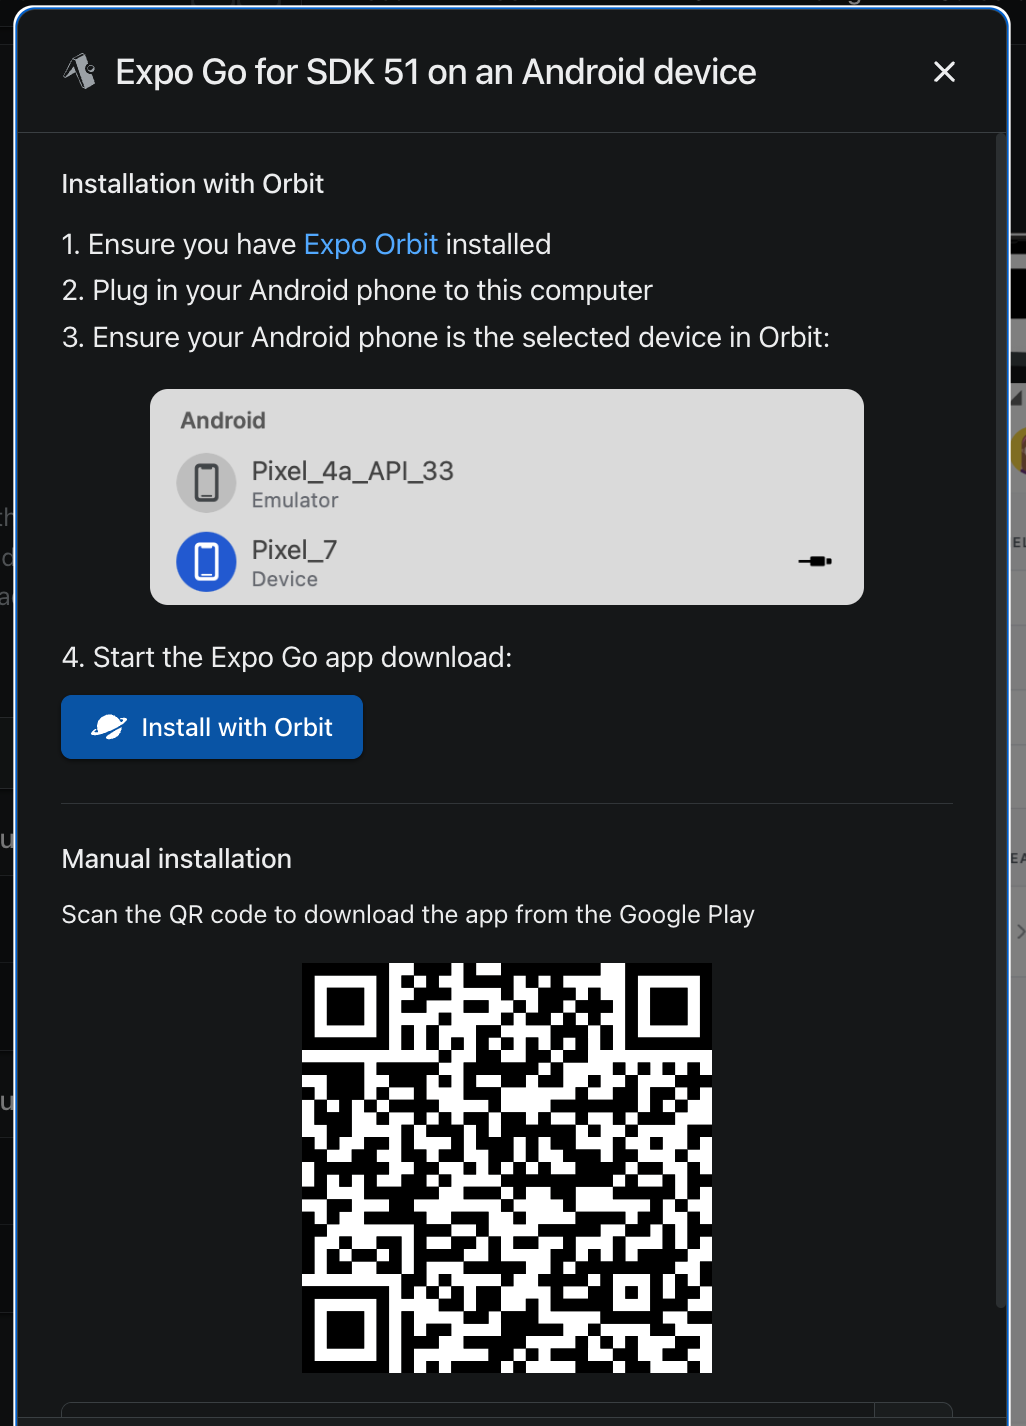
Note: We are not using Expo Orbit in this example.
This QR code will take you to the Expo application in Google Play store. From here, install as you would an app from the Play store.
Once open, using the Expo Go app, scan the QR code that was presented in the terminal earlier and it will download, across your local wifi network, the application from your computer to the Android device.
Modifying ExpoSample
For our sample app named ExpoSample, the root page is located in:
/app/(tabs)/index.tsx
Let’s change the following code:
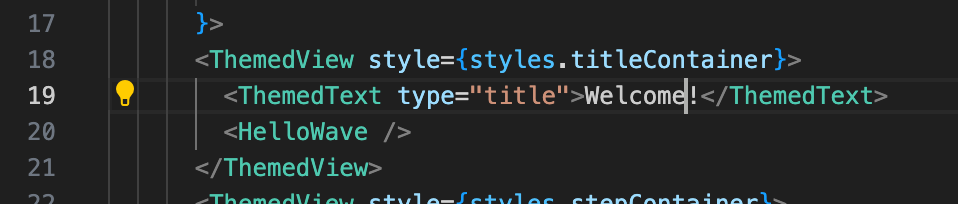
To something more personal like “Welcome to us!”, just to see the change reflected in the app:

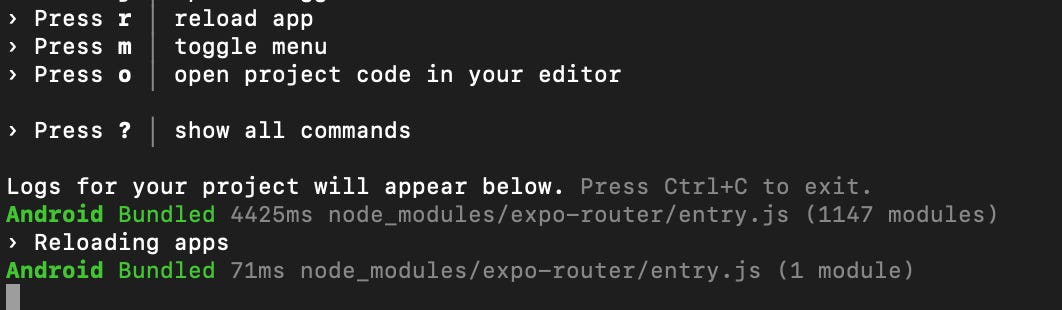
Save the file, then in the terminal press the r key to reload the application bundle to see the change. You will see the “Reloading apps” message:
In the device, Expo Go will relaunch the app bundle with the new text:
That’s it. There are things to consider in this setup.
Limitations
Expo Go is a sandbox. What it gives us is a quick way to start building and running React Native apps by providing a simple method to deploy the app to your phone. More directly, this means in its current setup, you will not be able to run your app outside of Expo Go’s sandbox on your device. This is by design and is intended to help a developer make progress fast. To make your app available before a proper app build and store deployment include:
Setting up a tunnel to allow access to your running app.
Share dev versions via Expo and Expo CLI.
Share pre-release versions via OS based previews.
Google Play Console or Apple App Store TestFlight.
Expo Go itself does not allow custom native code in its sandbox. Again this is by design. However the Expo SDK is quite mature already, and supports building your own custom modules into Expo SDK itself, which build later into native projects. You can find more on custom native code here. A regular Expo build however does support custom native code because it’s just a regular build app build environment.
The create-expo-app generator is updated quarterly to use the current latest React Native version. More details on this are found here.