
Guide: Homebrew, Python and Visual Studio Code on Mac
How to set up the basic developer environment on a Mac.

The following post will describe how to install the basic developer setup on a Mac from scratch, for working in Python.
Homebrew
First up, you will need a package manager. Homebrew has become the de facto choice recently on the Mac platform. First, you need to open a command line somewhere, either:
Open Launchpad, “Search” for “Terminal”, click it, or…
Open Spotlight search field, by pressing command + spacebar and type “Terminal”, press enter (or click it in the dropdown).
Now it’s time to actually install Homebrew. On the command line, paste the following command:
/bin/bash -c "$(curl -fsSL https://raw.githubusercontent.com/Homebrew/install/HEAD/install.sh)"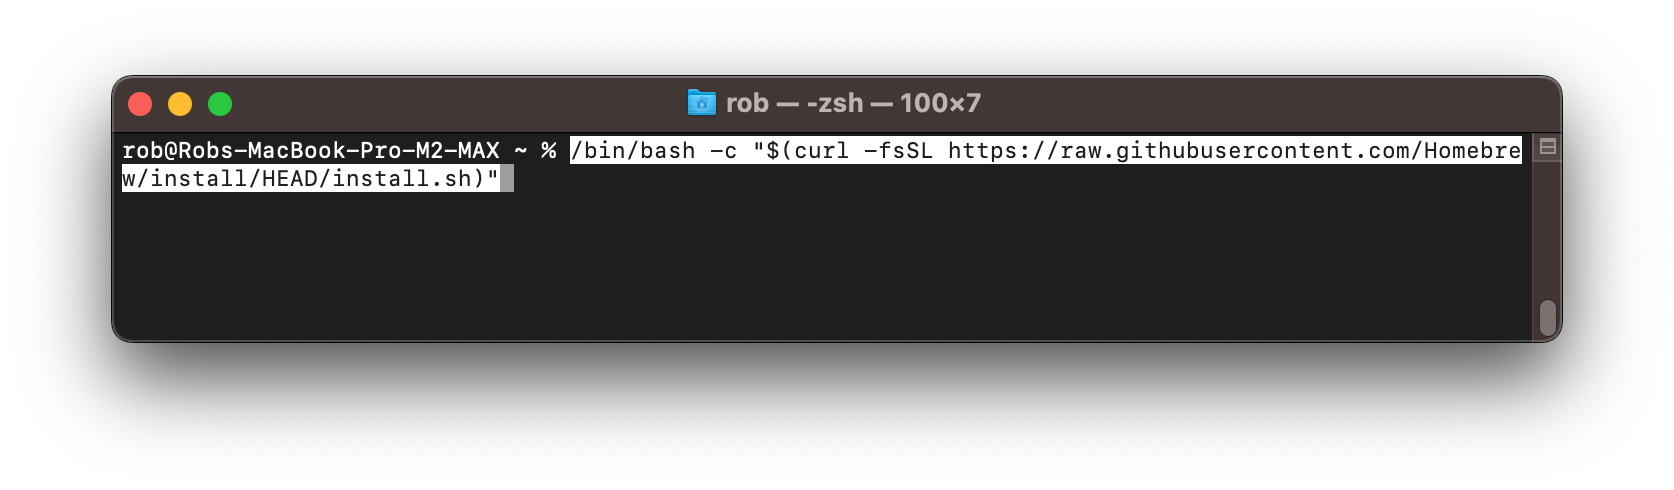
This command tells the bash shell to take the following command string in quotes and execute it, in this case, telling curl to go fetch the install script and run it. The reason for getting Homebrew is that it will make dealing with Python and other tools easier down the road.
You will be prompted for your password to allow sudo access for installation. It will ask you to install the Xcode Command Line Tools, to which you will press ENTER to agree and continue. These are tools to help developers do things on the command line.
At the end, you will be given more details for next steps:
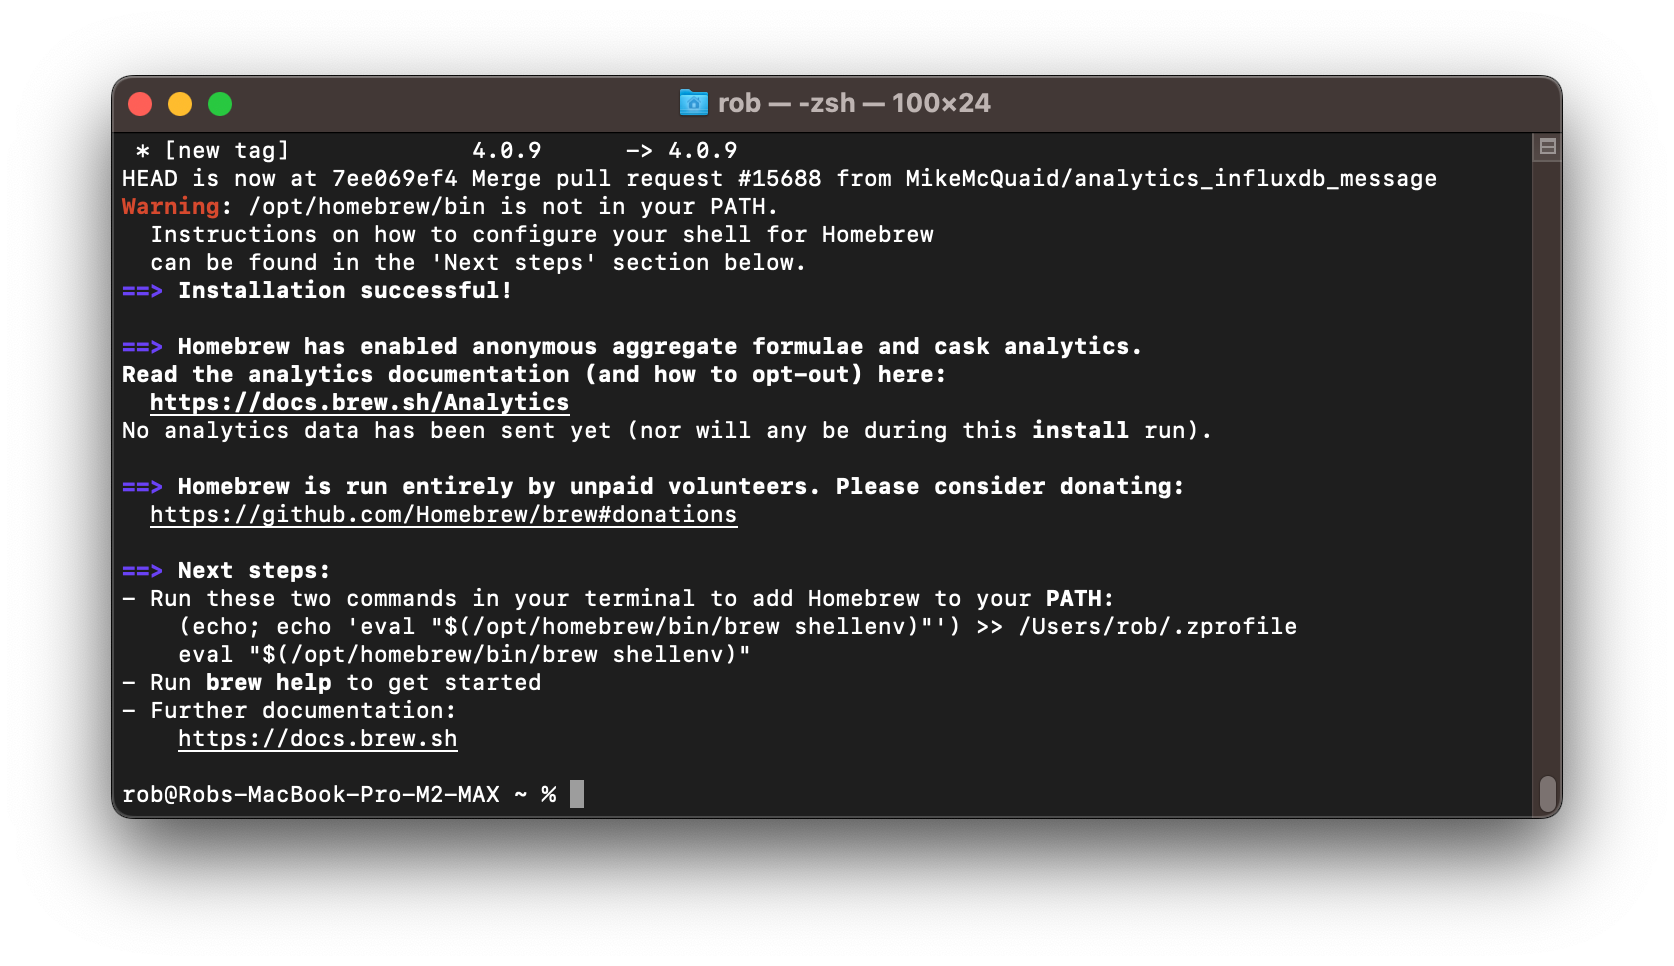
The critical item for now is ensuring your environment is set up correctly. The default shell on modern Macs is zsh, so its advised to run the following as suggested (note, you will need to change the path to your local path, not mine):
(echo; echo 'eval "$(/opt/homebrew/bin/brew shellenv)"') >> /Users/rob/.zprofile

eval "$(/opt/homebrew/bin/brew shellenv)"
These commands will set up your zsh shell to work with Homebrew by adding it to your path. You can confirm this worked by running the following and seeing that homebrew tooling was added to your PATH shell variable:
env | grep PATHTo confirm Homebrew now works, check its version via:
brew -vNOTE: The command name is brew, NOT homebrew.

Analytics (Optional)
If you do not want to report analytics data to the Homebrew project, you can disable a couple of different ways, either via a variable in your shell:
export HOMEBREW_NO_ANALYTICS=1Or by running the command:
brew analytics offMore info can be found on the Homebrew analytics page.
Brew Update
While we literally just installed Brew, it doesn’t hurt to be exposed how to update it before doing other package installations. The following command will update and upgrade brew itself:
brew update && brew upgradeBarring bad timing (or a delay in running this command), you should see a message “Already up-to-date”.
Python
Now that our Homebrew package manager is in place, time to install Python. We will be using Python via Visual Studio Code later. Thanks to brew this will be fairly simple. A few things to keep in mind however:
Python itself can be vary version sensitive when developing with it. This is purely just to get a basic setup going on the current version of Python.
Python itself has its own package manager named pip3. pip3 is specifically used to manage libraries relevant to Python itself, not tooling on your Mac.
The brew command to install Python3 is:
brew install python3At this time, version 3.11 is installed. Here is the trailing output from the installation if curious:

You can also confirm your Python3 installation (and version) is working by running:
python3 --versionVisual Studio Code
There, like most applications, many ways to install Visual Studio Code. We will continue to use Homebrew in this post.
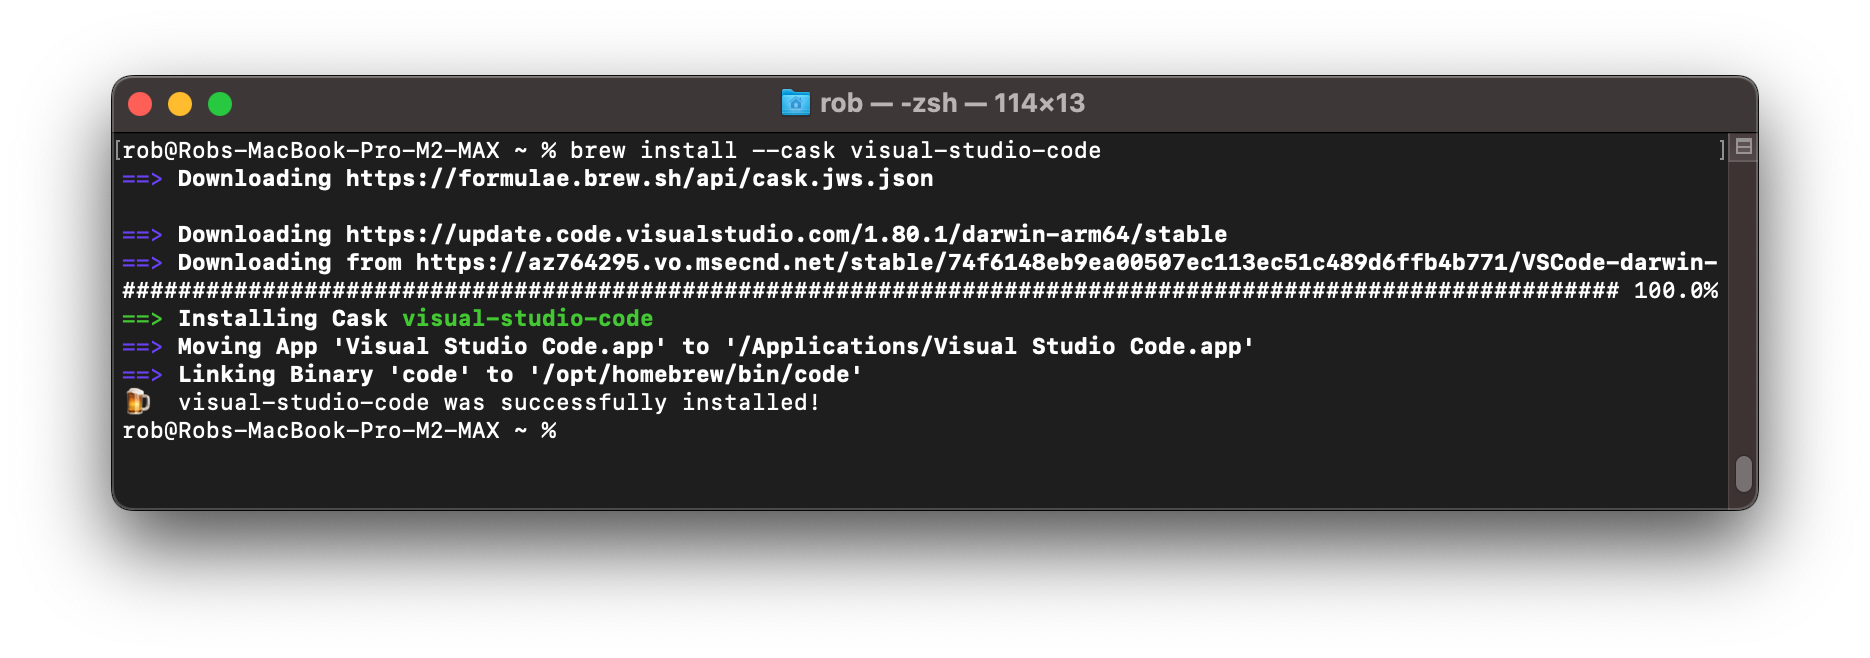
Cask
Cask is a project/feature, that is part of Homebrew, that allows the managing of larger precompiled binaries, graphical packages, etc. We will use the cask feature to download Visual Studio Code.
The command to run is as follows:
brew install --cask visual-studio-codeIf everything is working as planned, you will see output similar to the image below:
From here, we need to do some simple setup in Visual Studio Code.
Configuring Visual Studio Code
The first thing we need to do is set up where we would like our source code to live. In your terminal, navigate to your home directory and create a directory called “Repos” (short for repositories). You can call it whatever you like, but note “code” is actually the command for launching Visual Studio Code so I would advise against it for clarity.
cd ~
mkdir Repos
cd Repos
Now that you are in your Repos directory launch Visual Studio Code from this folder via:
code .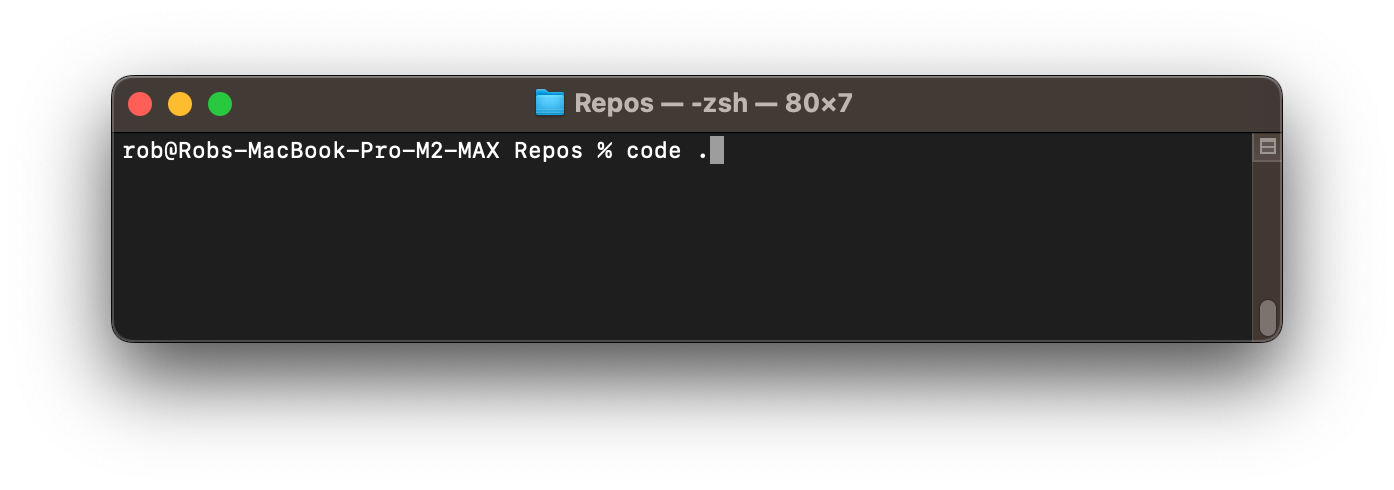
This tells Visual Studio Code to launch from inside the “Repos” directory.
From here you will have a choice to make regarding what files and directories you will trust as seen below:
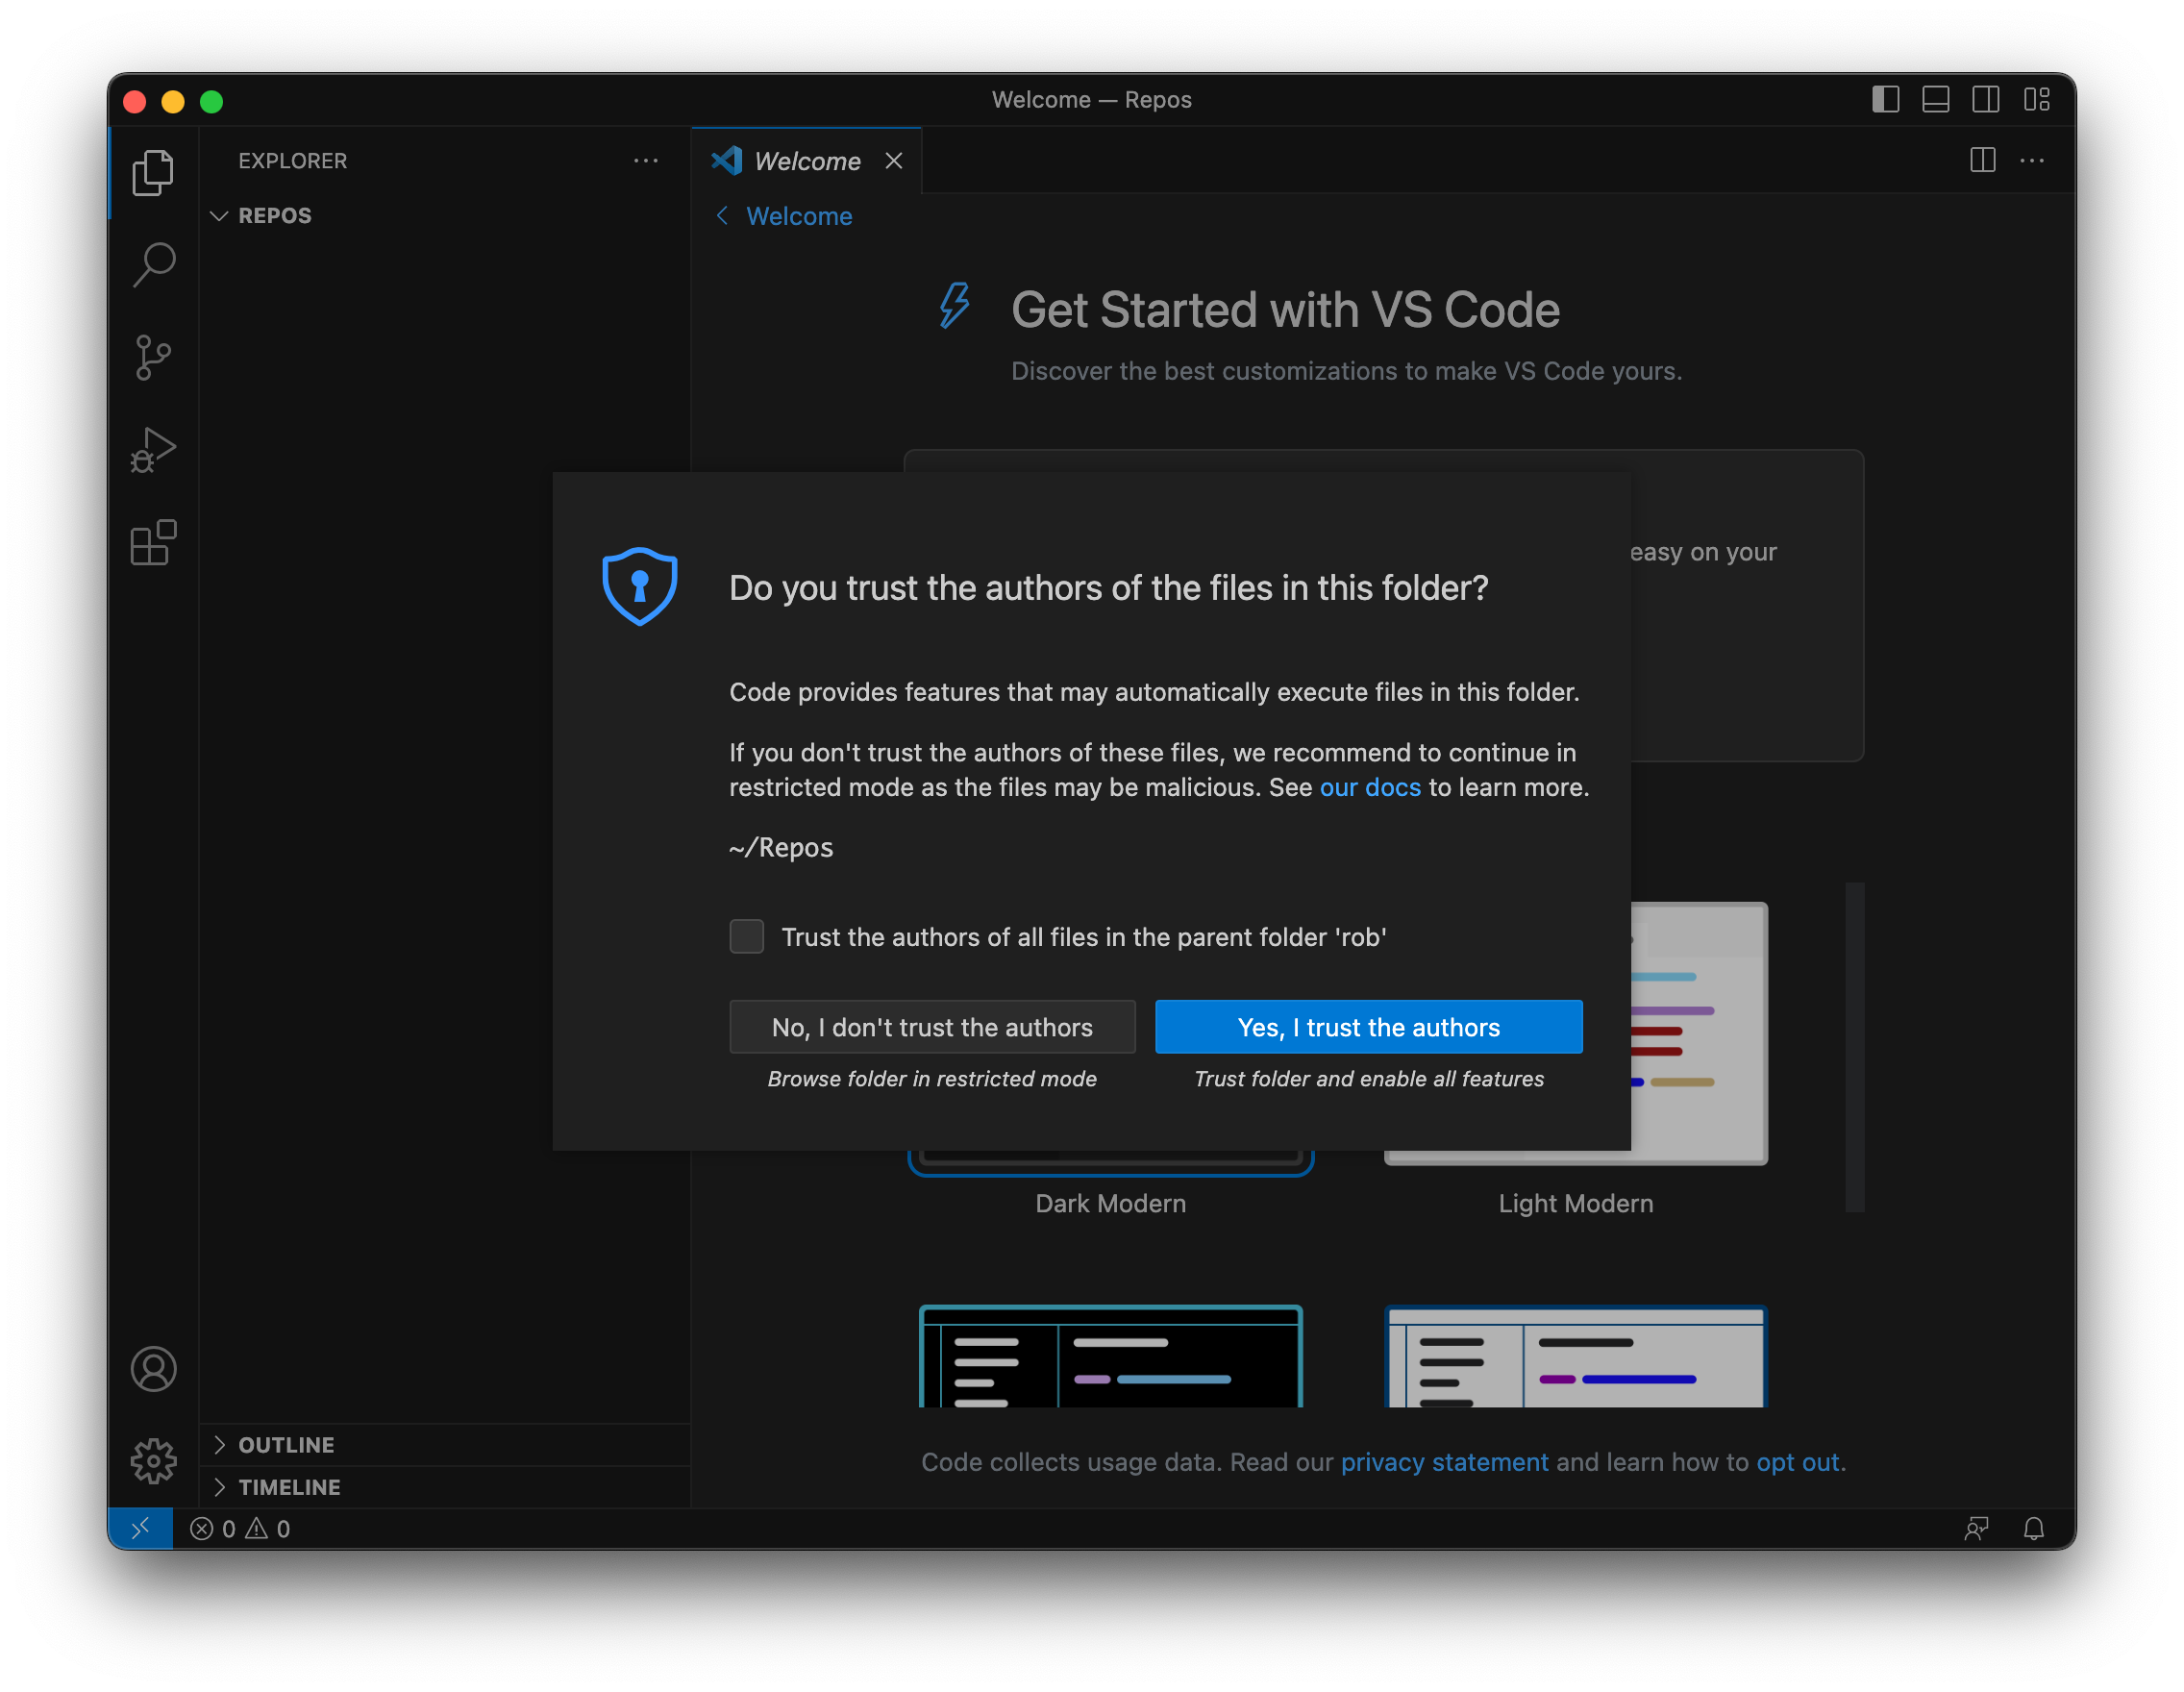
For now we only want to work from ~/Repos and below, so just click “Yes, I trust the authors” because for now, that’s yourself.
You will be prompted for some basic configuration choices at this point. It’s up to you what you prefer, or you can even ignore these for now by closing the Welcome tab. I chose to leave the Dark Modern color theme and closed the Welcome tab.
Visual Studio Code Python Configuration
The last configuration remaining is setting up Visual Studio Code to work with Python. Visual Studio Code inherently is just a powerful editor that is highly extensible. We are now going to extend it to work with Python3.
Extensions

Microsoft has provided an Extensions (the building block icons on the lower left) marketplace for all kinds of tools, languages, etc. To extend the editor to work with Python, we will install the Python extension seen above. Clicking Install will install the current version, not a pre-release version which is available in the dropdown.
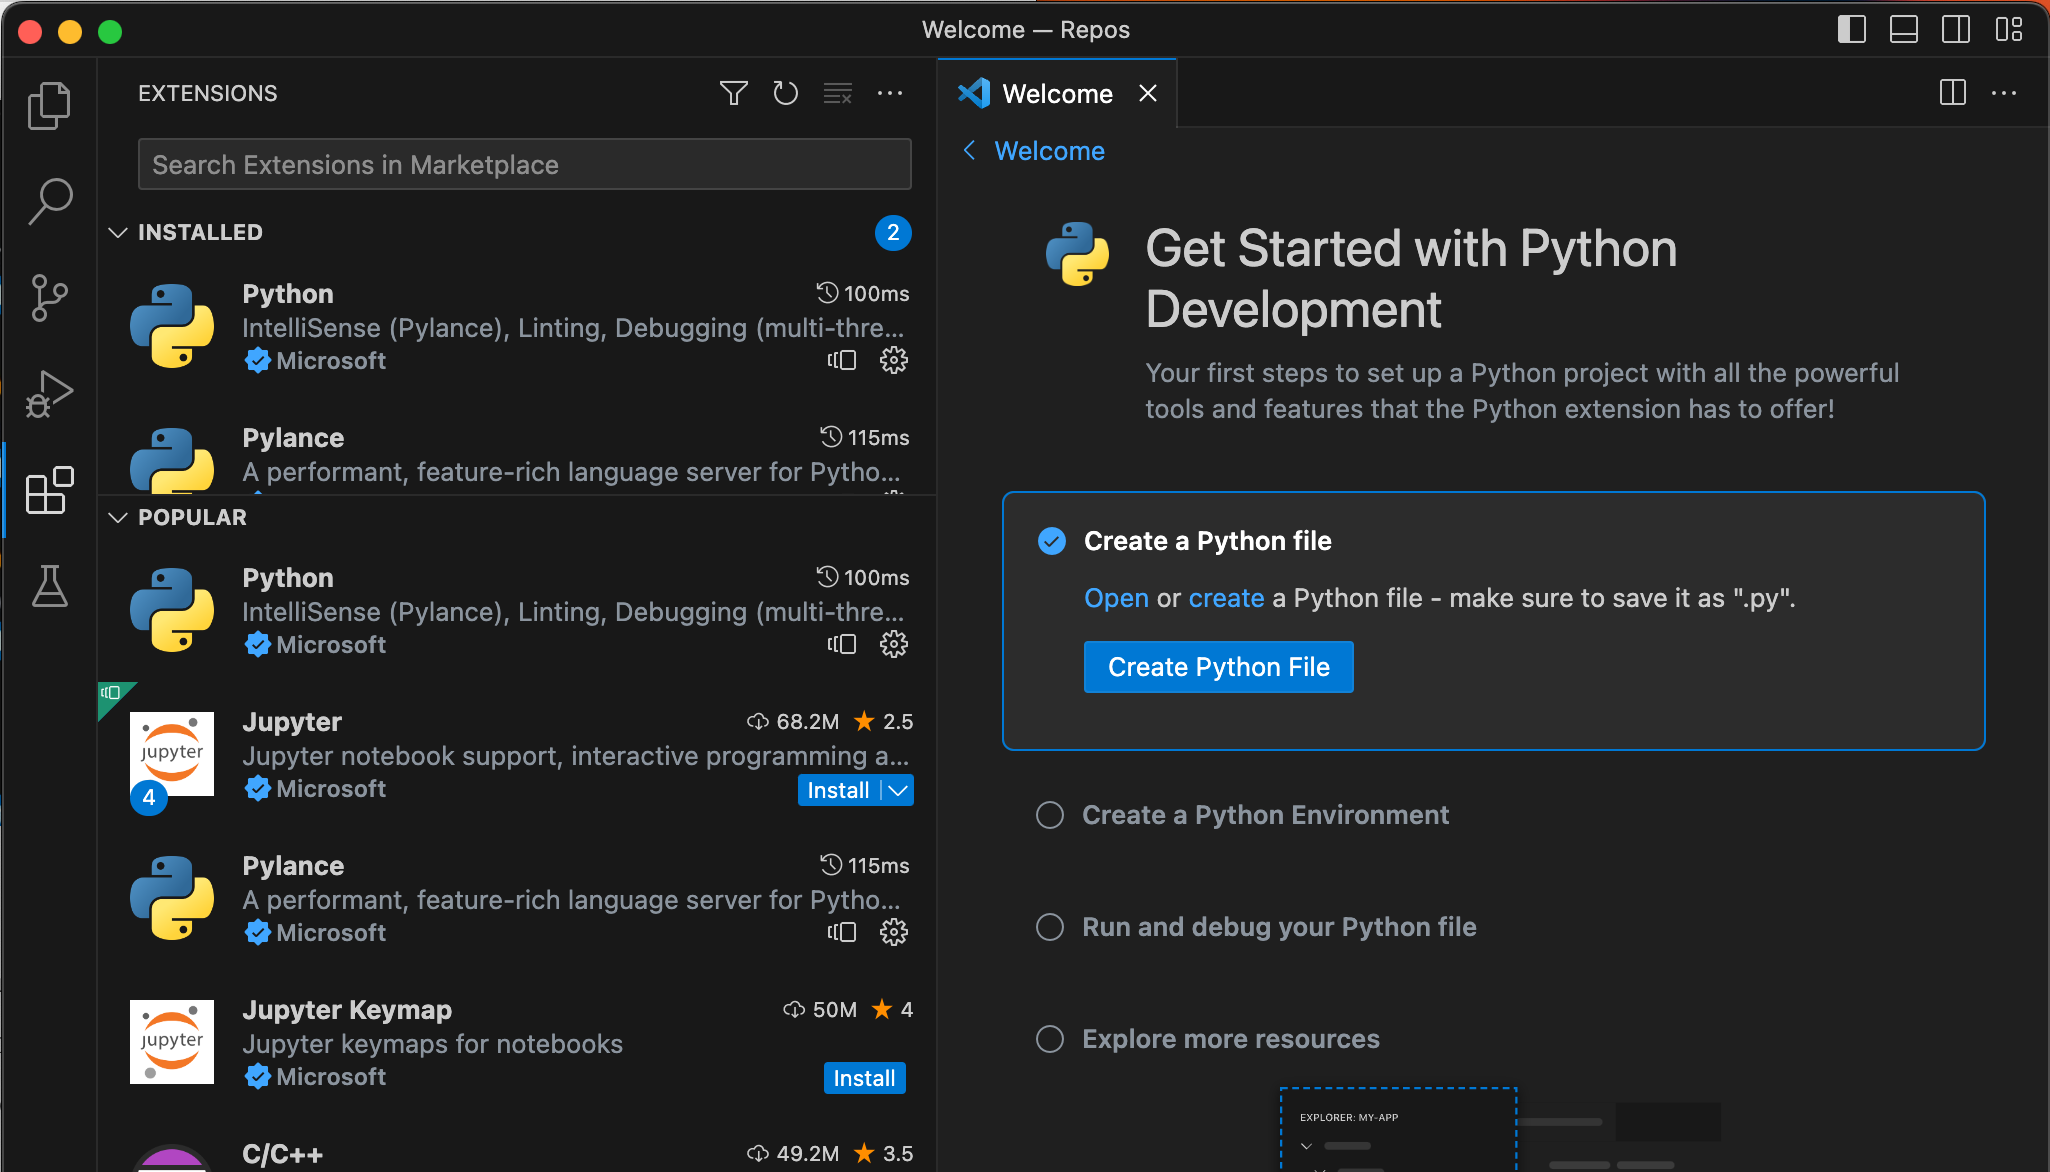
Once clicked, as shown above, the extension will be installed and this Welcome tab will pop-up. Now we can move on to actually creating and running a Python script.
Python
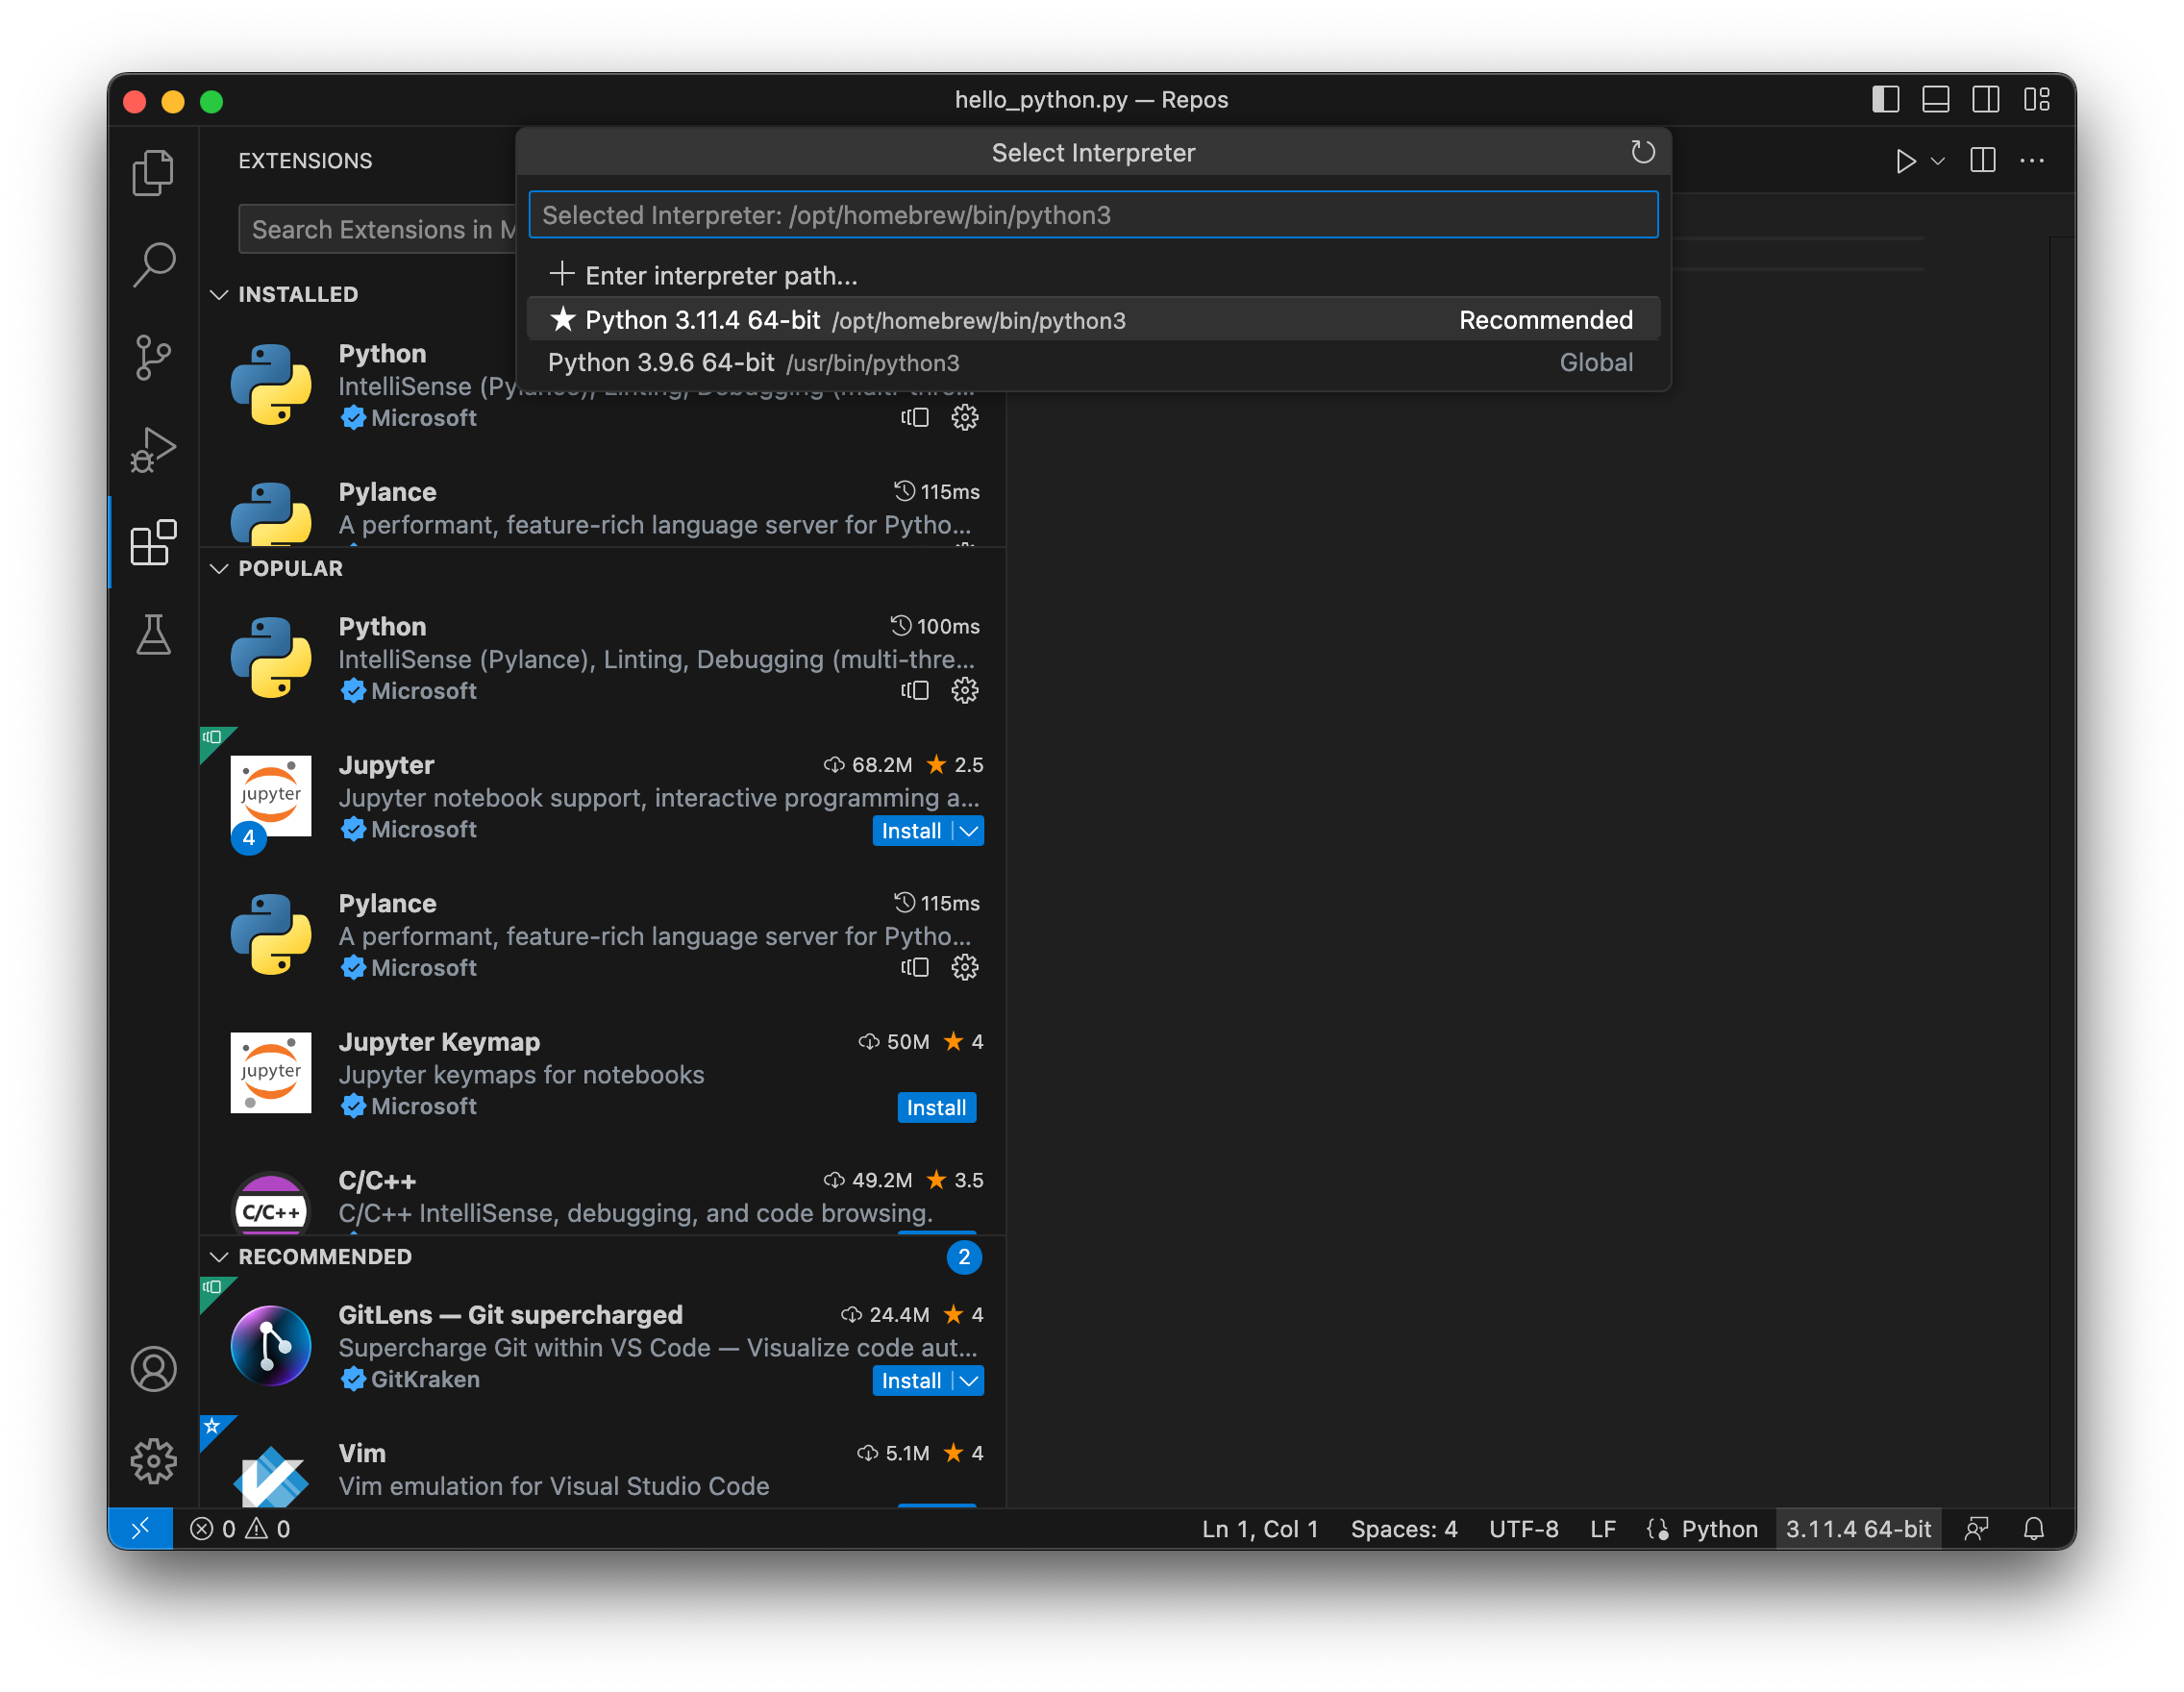
We can create a new Python script a few different ways, but for this tutorial, simply click the “Create Python File”, or if you already closed the Welcome tab, go to File→New File and create a new file named “hello_python.py”. If you chose the “Create Python File” option go ahead and hit command-s and save the file as “hello_python.py” to your Repos directory. The .py extension will be detected by Visual Studio Code and give you the appropriate options via a Python “language server” running behind the scenes.
Additionally you can now see the the environment has been setup for Python, using the Python3 package you installed earlier via Homebrew by change down in the status bar:
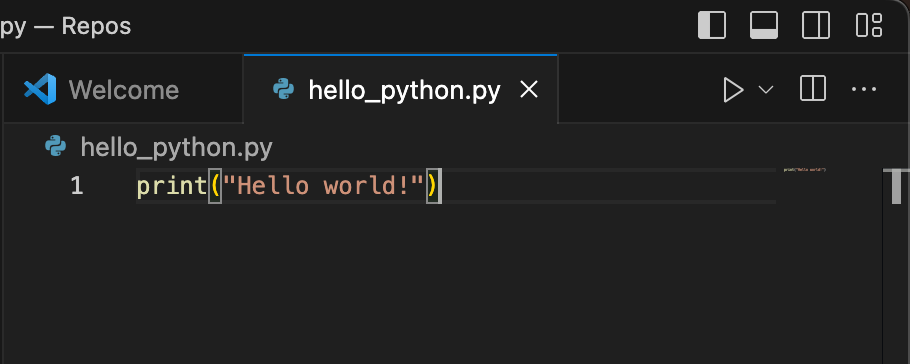
For now, let’s start with the classic printing of “Hello World”. Copy the following into your python script in the editor and save the file.
print("Hello world!")Running Python
Now to run this script, while open, simply press the play button:
The output will appear down in the terminal below:
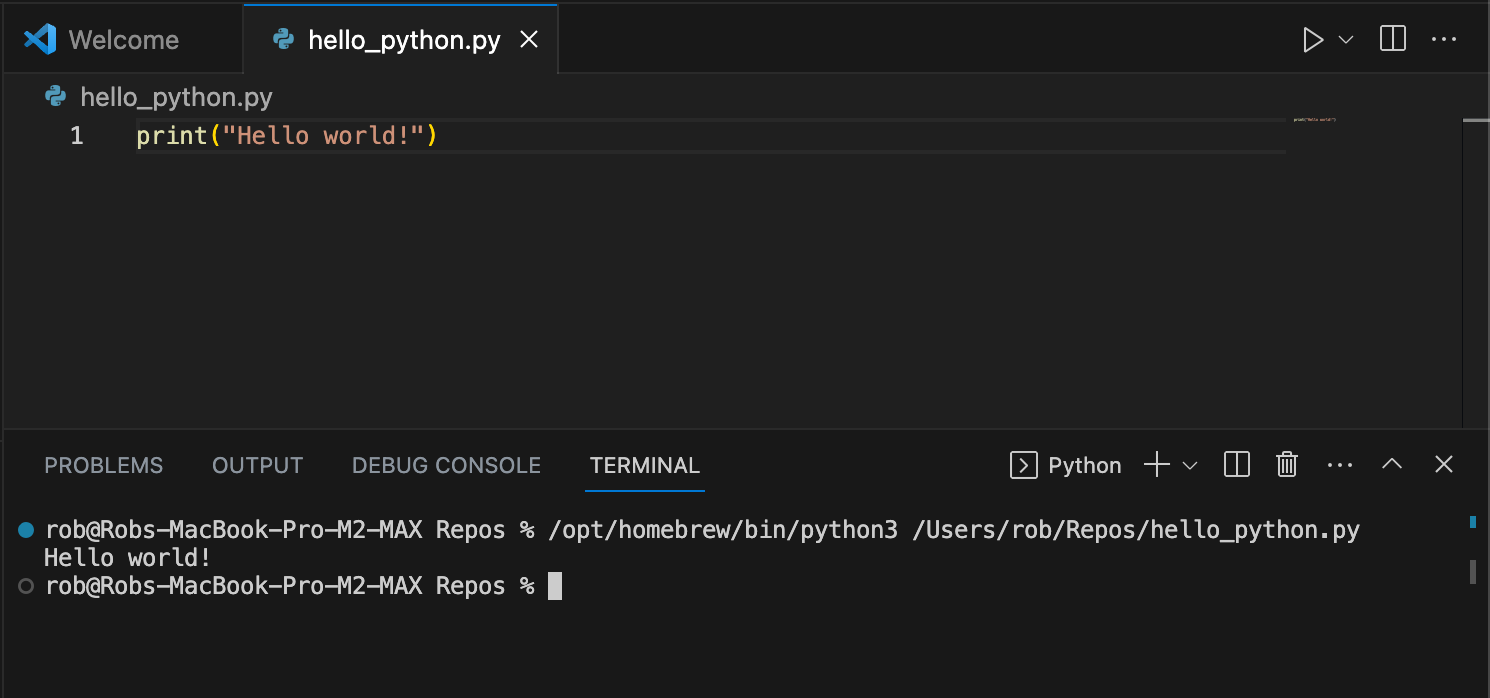
This output confirms to us:
Visual Studio Code is configured correctly to use Python.
The Python in use is what we installed via Homebrew (can see in the path of the python3 executable being in /opt/homebrew/bin).
That basic Python will execute in this environment.
Debugging
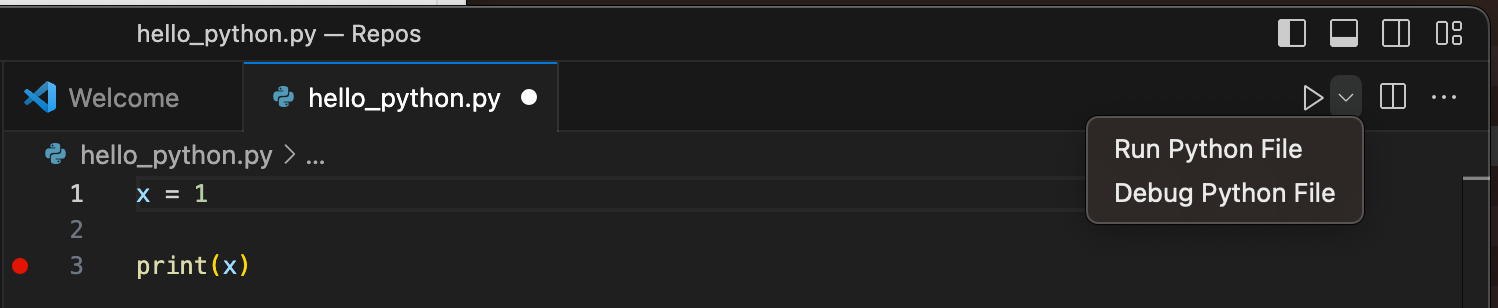
One last thing. In this example we have changed the code to print a variable, x, that has the value of 1. By clicking in the far left of the editor, in the “gutter”, you can click to leave a breakpoint. This in combination with the dropdown option to “Debug Python File”, will allow you to run your script in debug mode, and have its execution stop when that line (line 3 in this case) is reached. When the breakpoint is hit, you can further debug your script and either step or continue its execution.
Below is the Visual Studio Code IDE in debug mode, stopped at the breakpoint on line 3. To the left you can see the current value of x before it is printed to the terminal (by pressing continue or step over in the mini toolbar above the code).
