
Guide: Visual Studio Code and Github, Part 2
Authenticating with GitHub, adding and using source control with a local codebase, etc.

From the previous post regarding GitHub and Visual Studio Code, we will continue to build out how to utilize these tools to manage your source code in GitHub.
Prerequisites
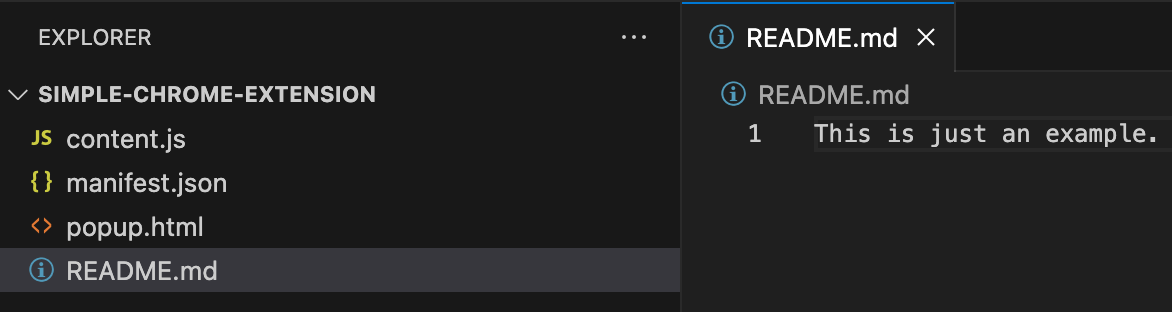
I will presume you have created a small project that you would like to add source control to. If you like you can follow this post to build a small Chrome extension to use (as we will here). Alternatively if you do not have anything ready, all you need to do is create a folder and inside that folder create a README.md file, like this:
Setting Up Authentication
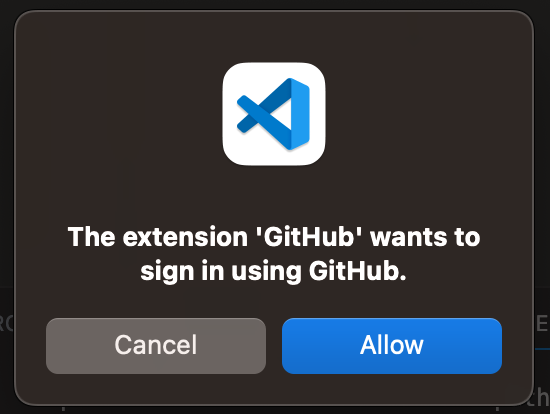
First step here is to confirm you are logged into the GitHub Pull Requests and Issues extension. You can confirm by clicking your accounts icon in the bottom left and confirm if you see a message to log into it, such as this:
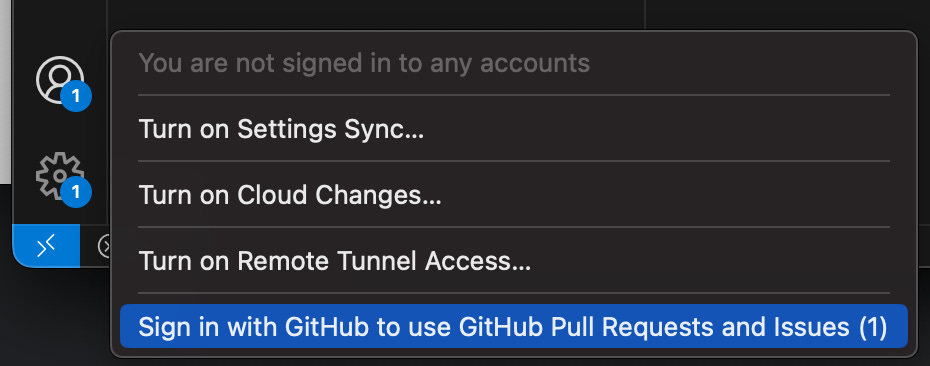
Clicking here will redirect you to your browser to log into GitHub and then prompt to open the *.dev link via Visual Studio Code. Accept this and VS Code will refresh and you will be good to go.
Repo Initialization
The first step towards getting your local code into GitHub is initializing a local git repo for your code. Open your desired directory via Visual Studio code if it’s not already open. On the left side, click “Source Control”, you will see a screen like this:
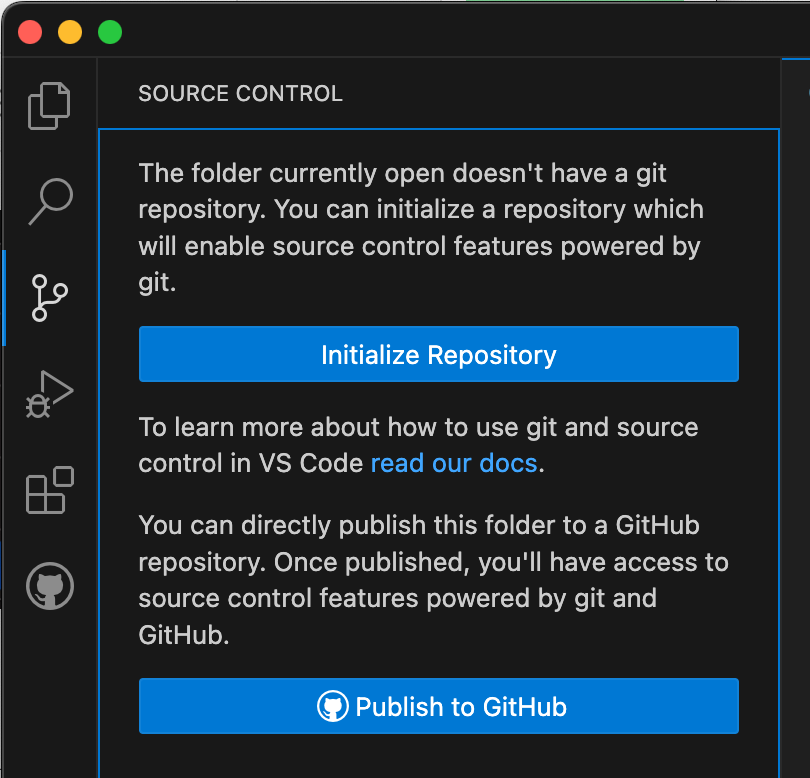
From here, it is as easy as it looks, click “Initialize Repository”. The view will now change, but what happened?
In your terminal (if not already, you can open in VS code via Terminal→New Terminal), you can type ls -a to see a new directory has been created named .git, and in it are several new files and folders. This folder is how git will maintain your version control history, credential configuration, etc.
In the earlier screenshot, you will see a variety of items. Critical things to know here:
Nothing is actually in source control yet, this is just preparing it.
Default is placing the files into an initial branch called “main”. You can also see what branch your on in the bottom left corner of VS Code:

VS Code showing your current branch, asterisk shows changes have been made. The files that we can choose to add now have a letter U, for untracked.

The next steps here are to take our existing files, and get them into the local main branch on our computer. How do we do this:
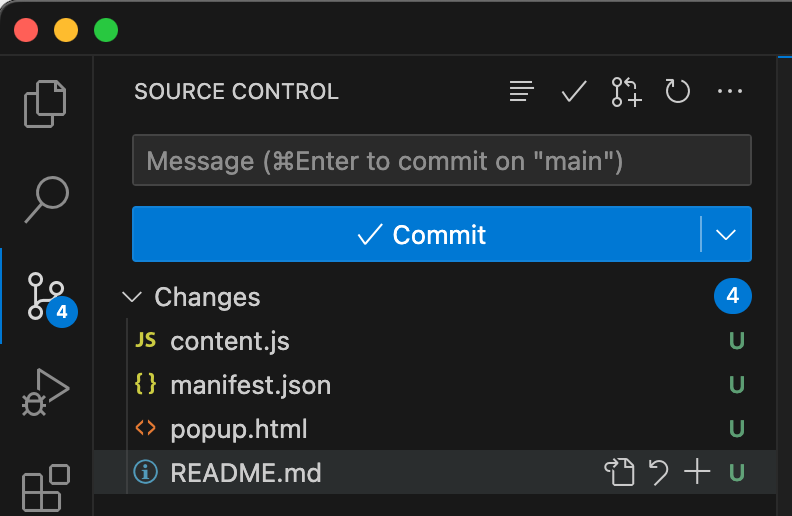
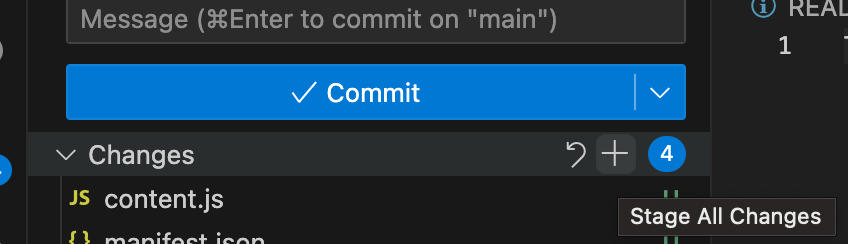
First step is to stage the changes. This means we are adding them to the main (our current) branch. This is done because as your code becomes more complex you might not want to include all new/updated files into this branch. In our case we want to add all, so to the left of the blue circle (which shows number of changed files) click the + sign to “stage all changes”:

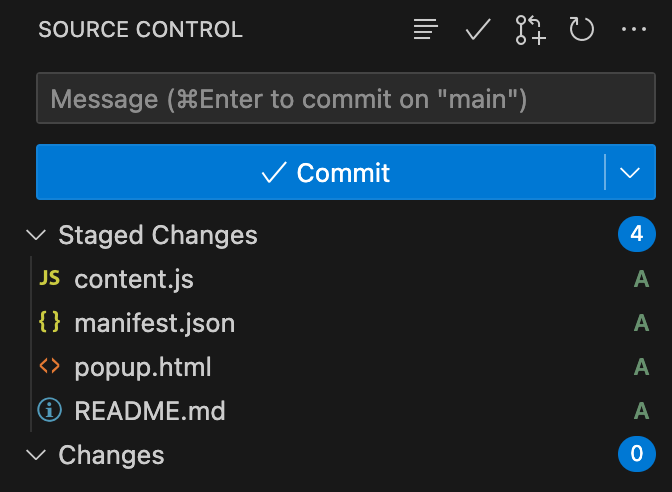
Staging all your new code in preparation to commit to the main branch. The tree will now change, to include a “Staged Changes” folder with our files, and the “Changes” folder now empty beneath it:

Updated view, showing staged changes. “A” means file has been added.
Now it’s time to commit our staged changes to the main branch! As is tradition for many repositories around the world, a simple message of “Initial commit”, or anything you like to describe your initial code/function of your branch, can be added to the Message text box. To commit:
Add your Message. In my case “Initial commit”.
Click Commit.
This results in:
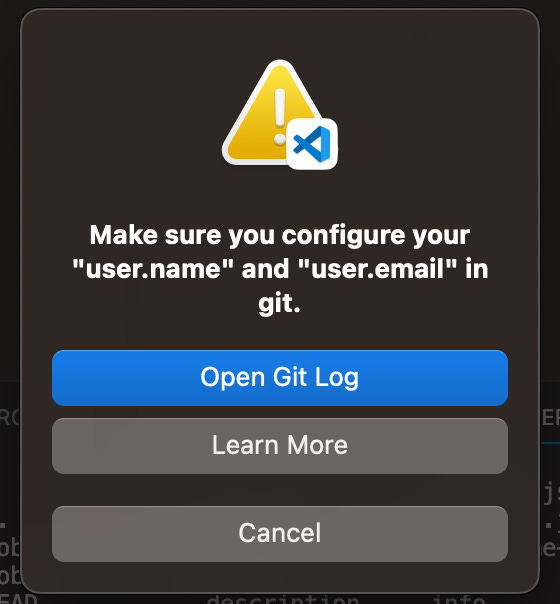
Disaster! What happened here?
I left this intentionally just to show how to do some light git debugging and to help understand how to properly configure. So click “Open Git Log” to see what happened.
Debugging Git
If you scroll up a bit you will see the fatal error relating to this message as well as some other messages about things not configured properly. In this case, the primary section concerns our identity:
2023-07-28 13:22:01.958 [info] Author identity unknown

*** Please tell me who you are.

Run

  git config --global user.email "you@example.com"
  git config --global user.name "Your Name"

to set your account's default identity.
Omit --global to set the identity only in this repository.

fatal: no email was given and auto-detection is disabled
Git needs proper details to help track changes in the files it is tasked to version. Luckily in this case, it literally tells us what to do. As this is our local development host and odds are we are working out of our own personal GitHub account, it’s safe to use the —global flag when setting these things up. To resolve this:
In the terminal run, after updating to your GitHub email address.
git config --global user.email "you@example.com"In the terminal run, after updating the name:
git config --global user.name "Your Name"
If you were curious and checked your directory for .git/config you will notice no update there. This is because we are using the global setting which will be in your home directory, so you can view like this:
rob@Robs-MacBook-Pro-M2-MAX .git % cat ~/.gitconfig
[user]
        email = "you@example.com"
        name = "Your name"
Now that we have updated, please click Commit again and watch your initial files land on the "main branch”.
Publishing Your Repo to GitHub
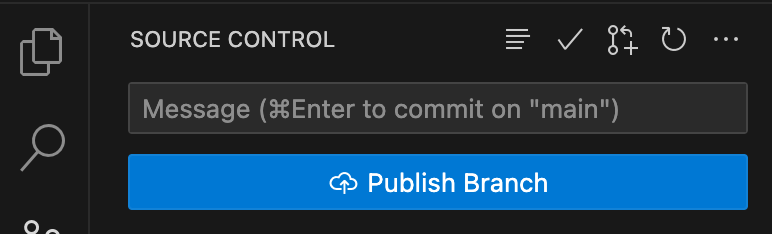
You might have noticed the button changed to “Publish Branch”.
As there doesn’t seem to be much else to do, let’s click it. What, failed again?
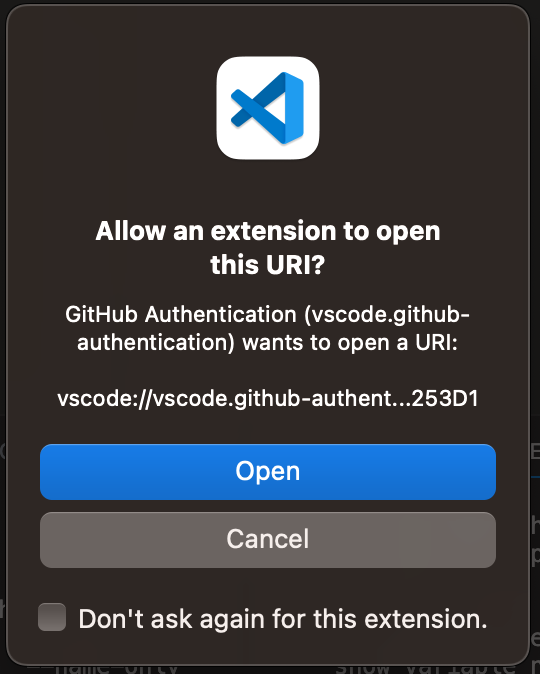
Ok not so much a failure, rather as it’s our first go around, we need to allow the extension to work directly with GitHub so click allow. You will be prompted to allow the extension to open the authentication endpoint, so click Open:
You might miss what’s next so be careful. VS Code will prompt you to add either to a private or a public repository. Given I am creating this post, I will place it in a public repository.

Immediately, barring any issue, you will multiple dialog boxes pop up, such as below:
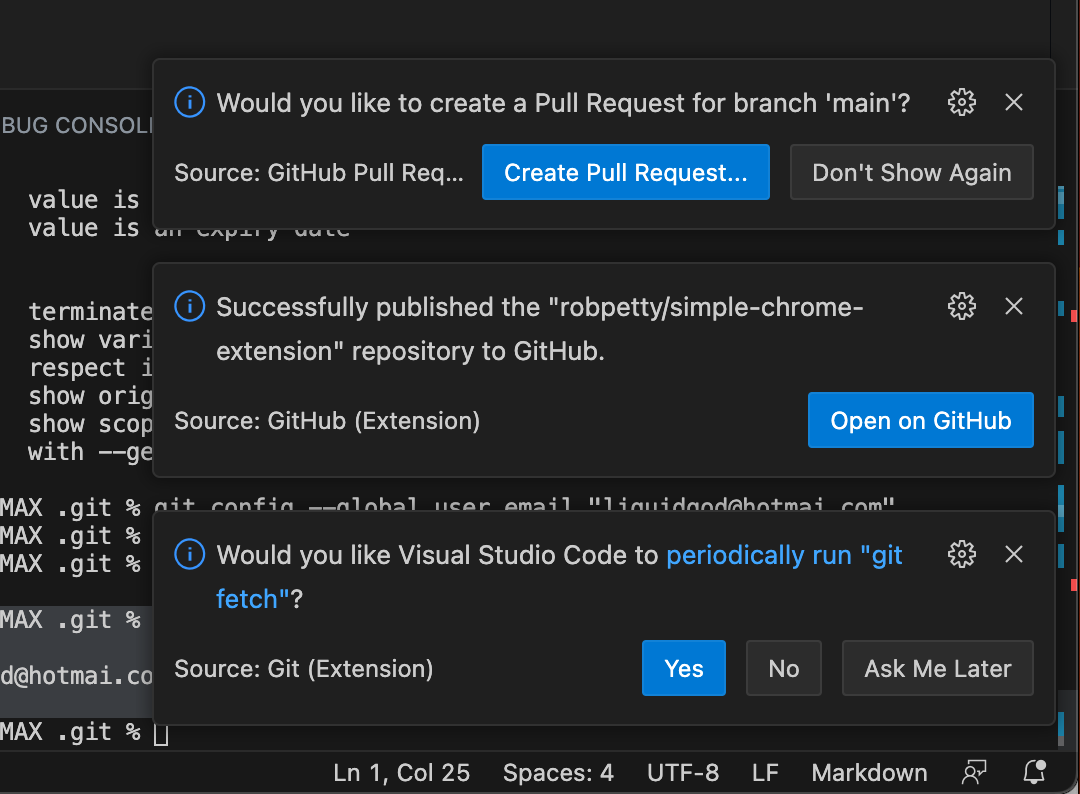
VS Code Dialogs After Publish Branch
The critical one here is the middle on, go ahead and click “Open on GitHub” to see your now hosted repository there:
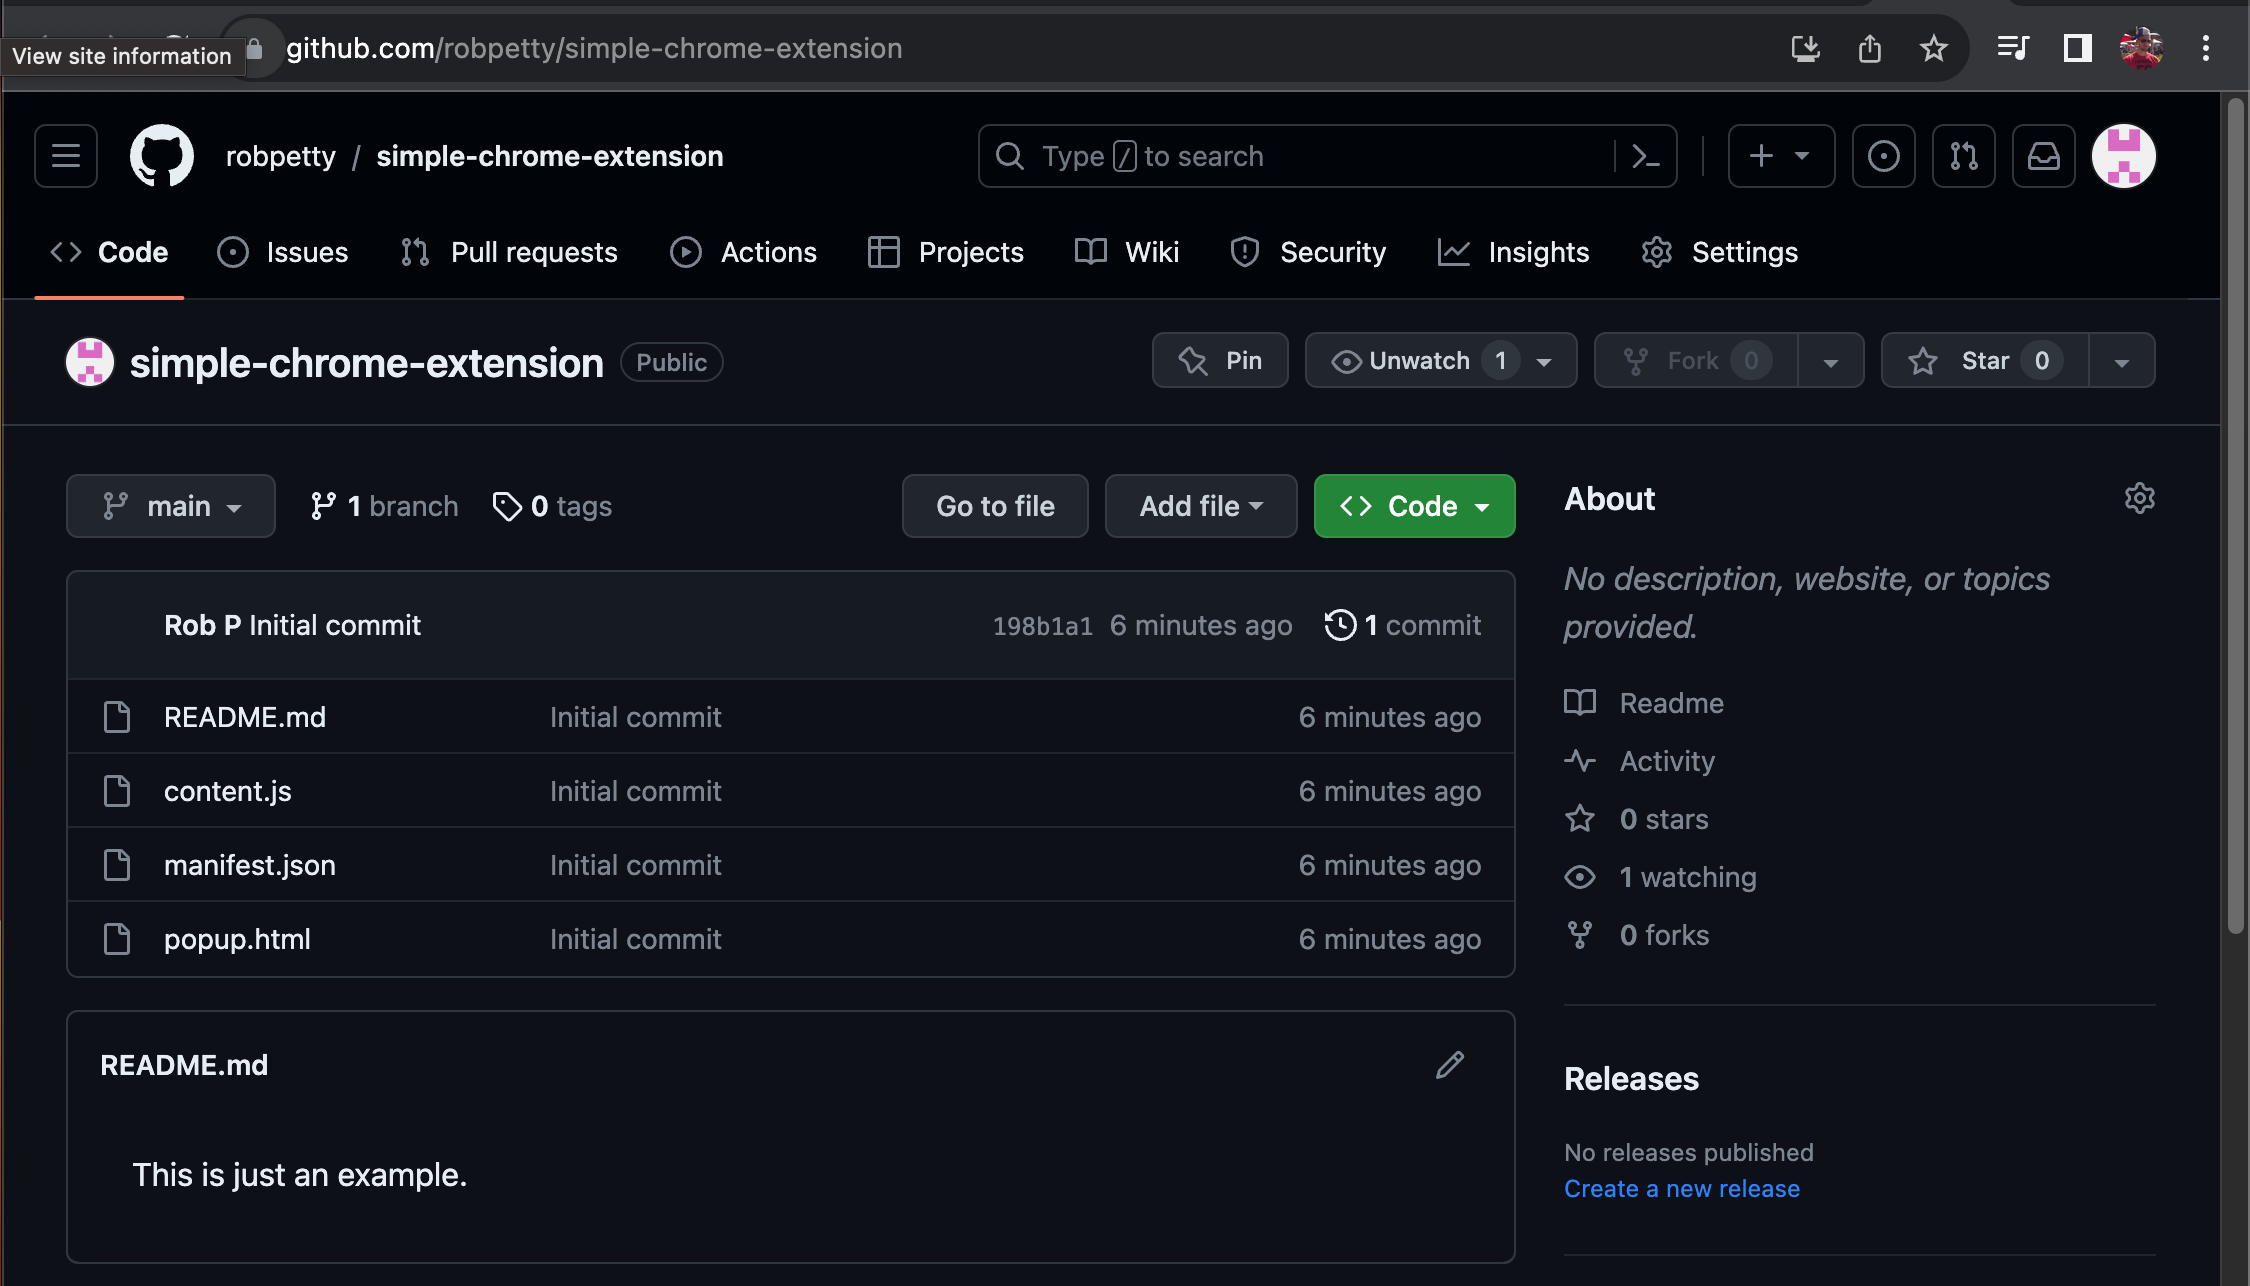
The URL will be basically your account name/folder name, so in this case:
https://github.com/robpetty/simple-chrome-extension
Notice your README.md, becomes the README file you see on the repo default landing page in the “<> Code” section.
As to the other dialog boxes:
As we just published our initial code to GitHub, there are no updates to make so we do not need to “Create Pull Request…” at this time. A pull request is a merge request, meaning to pull a new branch (maybe has files for a new feature, or updates to existing code) back into the main branch (or parent branch if you have a large branching codebase). So just “X” out of it for now.
VS Code is asking to run “git fetch” periodically. This is good if you’re working with others, so you can see code updates that have been merged. You would want to know this if you need to update your working branch to include some new code, or looking to avoid conflicts, etc. So to this, click “Yes”.
Summary
VS Code, GitHub and Git combine to make a powerful feature set for keeping your source code safe and its progress understandable. Additional information can be found here.
There is a great detail more one can do with these tools, but that’s for another day, another post.