


Guide: MongoDB on Windows 10 with Docker Desktop, Ubuntu (WSL2)
A guide on how to quickly set up and use MongoDB on Windows 10 via mongosh in Ubuntu with Docker.

This post is intended to show how to:
Quickly setting up MongoDB in Docker on Windows 10.
Access the MongoDB instance from the WSL2 terminal (using Ubuntu).
Table of Contents
Overview
There are several ways to go about setting up MongoDB and interacting with it locally. This guide is more about showing what is doable, quickly, instead of creating a full permanent setup.
Initial Setup
WSL2 and Ubuntu on Windows 10
https://learn.microsoft.com/en-us/windows/wsl/install
The guide above will explain how to configure the Windows Subsystem for Linux on your Windows 10 machine. This can also be installed via the Microsoft Store, search for “Windows Subsystem for Linux“.
In this guide we are using the Ubuntu flavor of Linux.
NOTE: This guide presumes WSL 2 will be used. You can check the current version in PowerShell via:
wsl -l -vAnd if it’s set to version 1, you can update to 2 via:
wsl --set-default-version 2Docker Desktop
https://www.docker.com
There are multiple ways to work with Docker, the choice here is simply for expediency. Go to the website and:
Create an account if you do not have one.
Download Docker Desktop.
Log into docker.com.
MongoDB Community Edition
https://www.mongodb.com/docs/manual/tutorial/install-mongodb-on-ubuntu/
For clarity, this package would include MongoDB as well. However, the goal here was to show how to interact with the database instance in a Docker container. This package is being used simply to obtain “mongosh” so we can interact with the instance from the Ubuntu terminal.
NOTE: Be sure to select the proper Ubuntu version on step 2 for creating the list file. You can validate what version of Ubuntu you have in the WSL2 terminal via:
lsb_release -dcConfigure and Launch
Now that the basics have been installed locally, it’s time to configure.
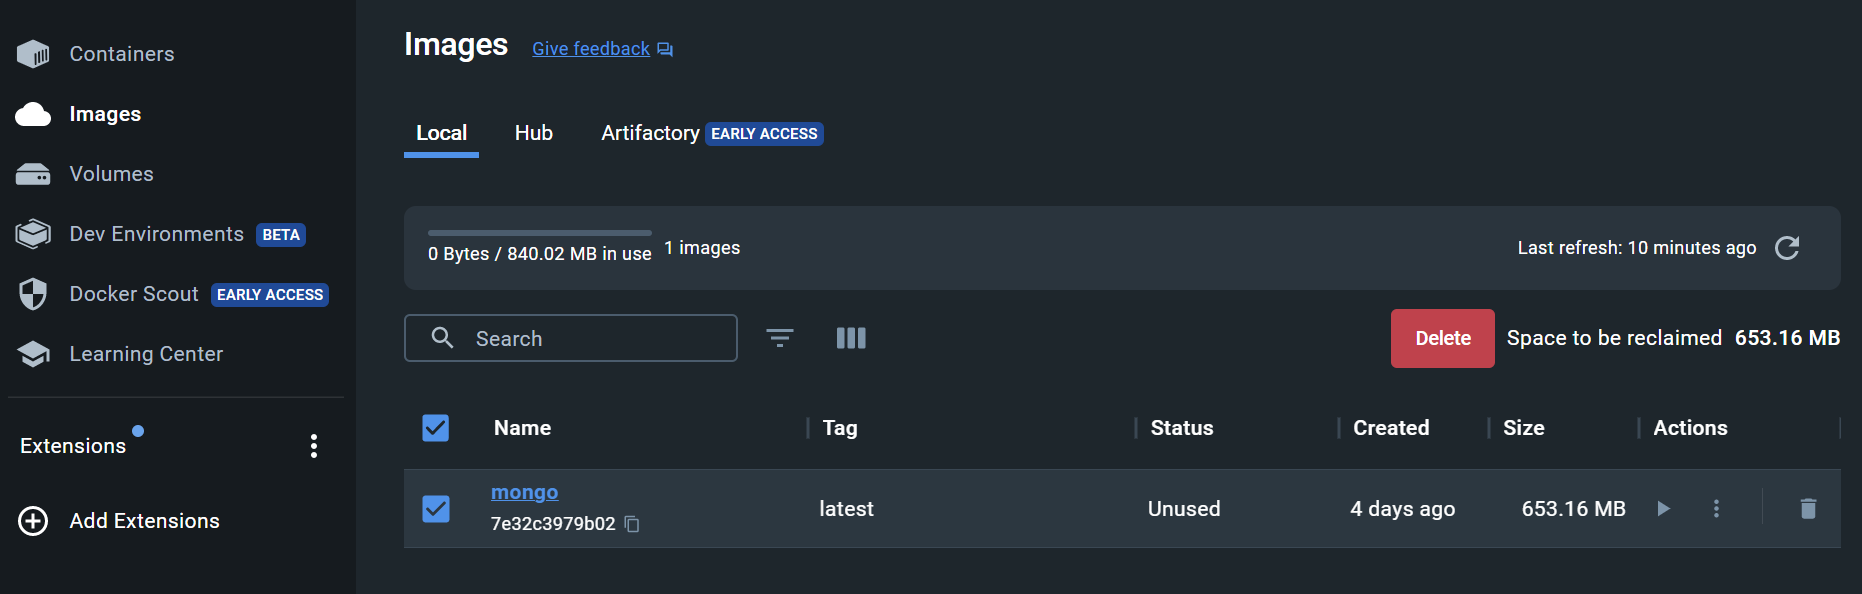
Obtaining the MongoDB Docker Image
To obtain the current latest mongo image (mongo:latest):
Open Docker Desktop
Click “Search for local and remote images, contains, and more…” on the top of the application (or press Ctrl+K).
Click “Images”.
Type “mongo”.
In the results, look for “mongo” with a ribbon next to it, the tooltip when hovering over it will be “Docker Official Image“. Click this line and beneath the results will show additional information about this image.

Click “Pull”, to download the latest image (Tag is defaulted to latest).
Launching mongo
Now that MongoDB has been obtained, you can launch the database and connect. There is a critical item that must be addressed here related to your networking. We will need to expose mongodb from inside the Docker mongo container (the running mongo image). To do this, you can set the port forwarding up when you launch the image.
Under Actions, click the arrow icon.
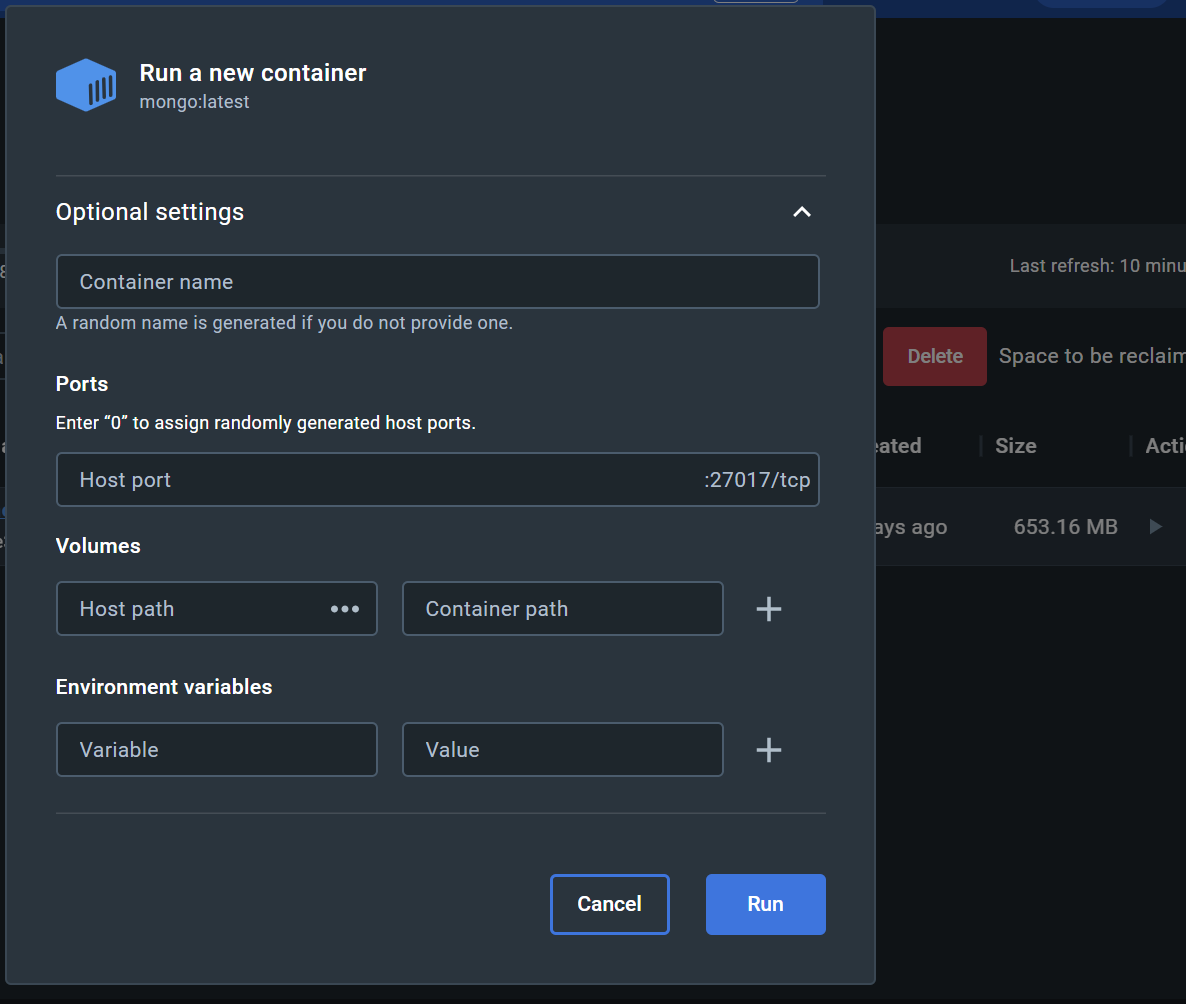
Expand the optional settings in the “Run a new container” dialog.
In the Ports section, we want to map the internal mongod port (27017) to a port that can be accessed outside the image. In this case, most tools by default, including those provided in the MongoDB Community Edition, will default to this port as well. Meaning we will use the same port:

Click Run.
Presuming no errors, Docker Desktop will now switch the Containers tab, on the Logs screen showing output from the container (the running image).
Connecting to MongoDB via mongosh in Ubuntu
Now that Docker is running the mongo container, you can test connectivity simply by running “mongosh” in your Ubuntu terminal:
rpetty@UtopiaDellXPS13:~$ mongosh
Current Mongosh Log ID: 649771886885ee072bc8e169
Connecting to:          mongodb://127.0.0.1:27017/?directConnection=true&serverSelectionTimeoutMS=2000&appName=mongosh+1.10.1
Using MongoDB:          6.0.6
Using Mongosh:          1.10.1

For mongosh info see: https://docs.mongodb.com/mongodb-shell/

------
   The server generated these startup warnings when booting
   2023-06-24T22:35:44.403+00:00: Using the XFS filesystem is strongly recommended with the WiredTiger storage engine. See http://dochub.mongodb.org/core/prodnotes-filesystem
   2023-06-24T22:35:44.981+00:00: Access control is not enabled for the database. Read and write access to data and configuration is unrestricted
   2023-06-24T22:35:44.982+00:00: /sys/kernel/mm/transparent_hugepage/enabled is 'always'. We suggest setting it to 'never'
   2023-06-24T22:35:44.982+00:00: vm.max_map_count is too low
------
Troubleshooting
As noted earlier, this guide is a quick start, it’s not intended to list out all best practices, or offer more involved guidance. However, there are some items to reiterate and note in case you run into issues launching your container or access it.
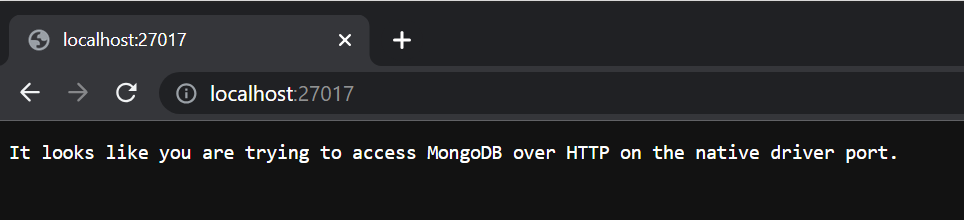
Port Forwarding
Do not forget to configure the port to expose the running containers mongod instance to your local system. You can validate this was set correct via your local browser by visiting:
http://localhost:27017
Ubuntu/WSL2 vs PowerShell
Due to the nature of Linux running on Windows 10 versus PowerShell, you will run into cases of different levels of access. For example, running “mongosh” in will result in:

This is because MongoDB Community Edition is installed in Ubuntu, not Windows 10. However, some basic tooling is available in PowerShell, such as “docker” itself.
Bonus
Here are some additional things one can do to test this out.
Docker Desktop
You can use Docker Desktop to jump directly into the running container. Click on the “Terminal” tab.

Once inside, by default there is a hidden database named “test”. However, running “show databases” will not return it, because it does not contain any documents. So from here, we can create a sample document:
test> show databases
admin   40.00 KiB
config  60.00 KiB
local   40.00 KiB
test> use test
already on db test
test> db.testCollection.insertOne({x:1})
{
  acknowledged: true,
  insertedId: ObjectId("6497717a12b980791fc9e6b6")
}
test> show databases
admin    40.00 KiB
config  108.00 KiB
local    40.00 KiB
test     40.00 KiB
Ubuntu and mongosh
Now, back in the terminal, you can run mongosh and interact with the new collection and document that was just created:
rpetty@UtopiaDellXPS13:~$ mongosh
Current Mongosh Log ID: 649771886885ee072bc8e169
Connecting to:          mongodb://127.0.0.1:27017/?directConnection=true&serverSelectionTimeoutMS=2000&appName=mongosh+1.10.1
Using MongoDB:          6.0.6
Using Mongosh:          1.10.1

For mongosh info see: https://docs.mongodb.com/mongodb-shell/

------
   The server generated these startup warnings when booting
   2023-06-24T22:35:44.403+00:00: Using the XFS filesystem is strongly recommended with the WiredTiger storage engine. See http://dochub.mongodb.org/core/prodnotes-filesystem
   2023-06-24T22:35:44.981+00:00: Access control is not enabled for the database. Read and write access to data and configuration is unrestricted
   2023-06-24T22:35:44.982+00:00: /sys/kernel/mm/transparent_hugepage/enabled is 'always'. We suggest setting it to 'never'
   2023-06-24T22:35:44.982+00:00: vm.max_map_count is too low
------

test> show collections
testCollection
test> db.testCollection.find()
[ { _id: ObjectId("6497717a12b980791fc9e6b6"), x: 1 } ]
test> quit