Guide: Stable Diffusion and Automatic1111
A guide on how to install Stable Diffusion and Automatic1111 on a Mac to use generative AI to create images.

The intent of this guide is to show quickly how you can configure various open-source projects locally on your Mac to use generative AI to create images. We will be using code from the following projects:
Automatic1111 - A web interface to work with Stable Diffusion models.
Stable Diffusion - A series of text-to-image models and tools developed by Stability AI.
Prerequisites
In this guide, as its for a Mac based on M-series silicon, the following assumptions are made:
You have an M-series CPU (in my case an M2 Max).
Installation
The first thing to do here is to install Automatic1111. We will get this up and running before downloading any models.
Automatic1111
First thing to do is go to the current instructions for installing on Mac based silicon here.
Install Homebrew if you do not already have it.
Using the
brewcommand, install a series of tools needed to build the project.
brew install cmake protobuf rust python@3.10 git wgetNext step is to clone the Automatic1111 repo to your preferred location.
Navigate to your preferred source code folder. Then run the following:
git clone https://github.com/AUTOMATIC1111/stable-diffusion-webuiThis will create a folder named
stable-diffusion-webui.
Testing Automatic1111
While we have no Stable Diffusion models to run, we can now test if Automatic1111 is ready. Run the following commands to launch the Automatic1111 service:
rob@Robs-MacBook-Pro-M2-MAX Repos % cd stable-diffusion-webui
rob@Robs-MacBook-Pro-M2-MAX stable-diffusion-webui % ./webui.sh
A lot of packages will initially be downloaded. If everything goes to plan, you will see something like this in your terminal:
rob@Robs-MacBook-Pro-M2-MAX stable-diffusion-webui % ./webui.sh

################################################################
Install script for stable-diffusion + Web UI
Tested on Debian 11 (Bullseye), Fedora 34+ and openSUSE Leap 15.4 or newer.
################################################################
...
Calculating sha256 for /Users/rob/Repos/stable-diffusion-webui/models/Stable-diffusion/v1-5-pruned-emaonly.safetensors: Running on local URL:  http://127.0.0.1:7860
...
Applying attention optimization: sub-quadratic... done.
Model loaded in 9.0s (calculate hash: 2.8s, create model: 1.8s, apply weights to model: 1.2s, apply half(): 0.2s, calculate empty prompt: 2.6s).
The key item to note there is the URL that is hosting the web ui:
http://127.0.0.1:7860
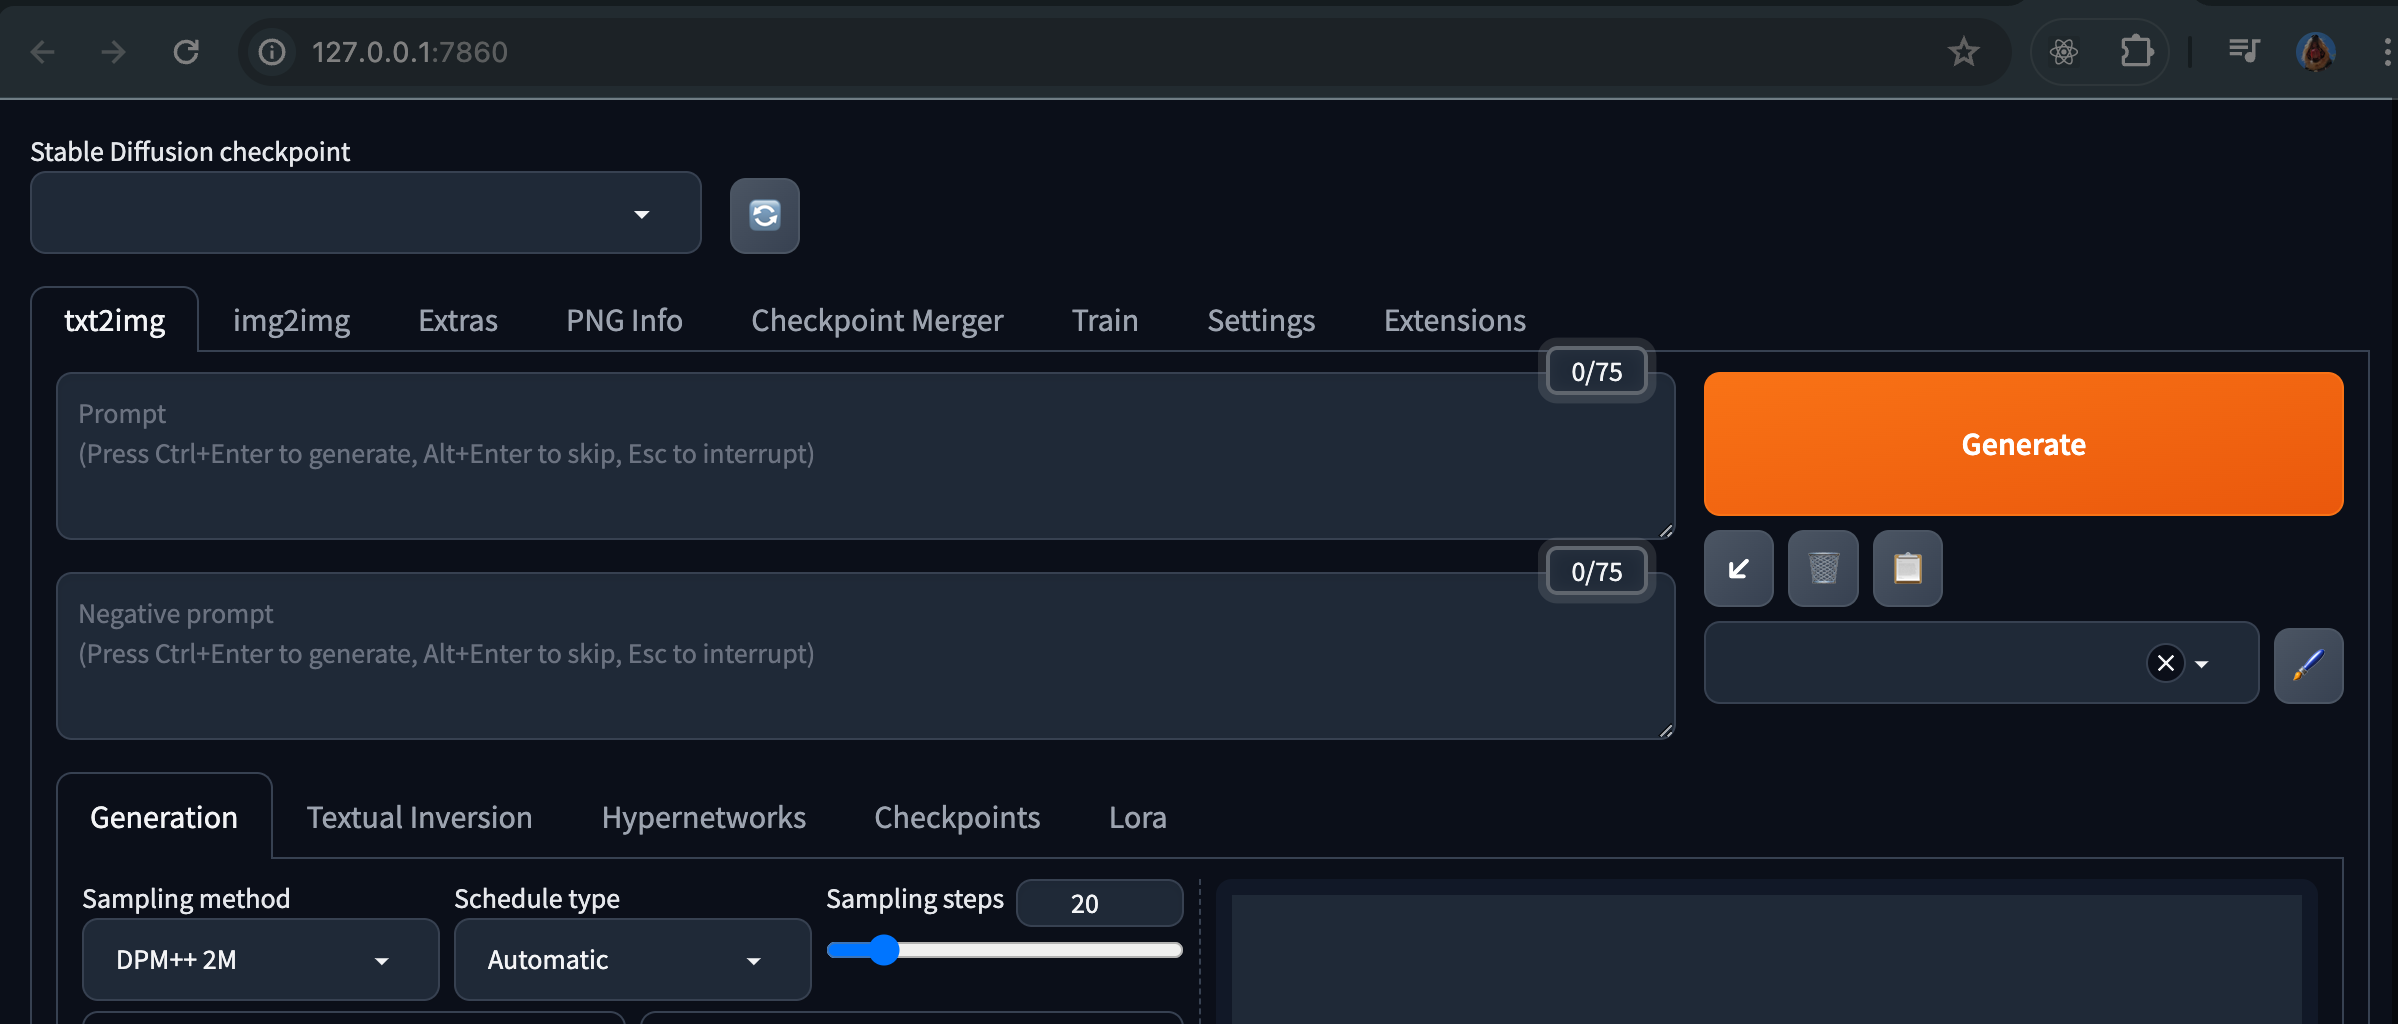
This is the URL you will use to access the Automatic1111 web interface (if it did not automatically open):
Currently, the cloned repo comes with a single Stable Diffusion model:
v1-5-pruned-emaonly.safetensors
In the 'Stable Diffusion checkpoint' dropdown, select that model and let’s try it out. In this sample, using the txt2img feature, lets set:
Prompt: Dog
Negative prompt: Cat
Click Generate
Again presuming everything has gone well you will see textual output in the terminal such as:

And when complete, an image with details of its generation ready for download:

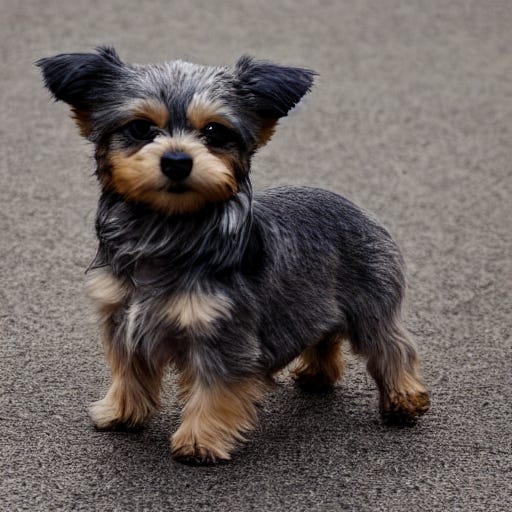
Here is the actual image generated after clicking save (in top right corner):
Alright, maybe not the best but the goal was to quickly get into generating actual images. From here, next steps include:
Learning the various options one can set via Automatic1111 to generate better images.
Investigate other Stable Diffusion models and their options. You can find these Text-to-Image models (and many others for other workflows) at Hugging Face.
The default model provided with Automatic1111 is over a year old now and many have surpassed its capabilities. However it doesn’t take much effort to start creating nicer images: